¶ indiePad Smart Keypad - User Guide
This guide takes you from a fresh, out-of-the-box keypad through setup, connecting it to
Home Assistant, and writing your first automation.
¶ Which mode do I want?
The keypad works in one of two modes. Setup (Part 1) is the same for both; after that,
follow only the part for the mode you picked.
| Home Assistant mode | Coordinator mode | |
|---|---|---|
| You have | Home Assistant with a Zigbee radio (ZHA or Zigbee2MQTT) | No hub |
| The keypad | joins your existing Zigbee network as an end device | forms its own Zigbee network and is the hub |
| Devices pair with | Home Assistant / Zigbee2MQTT | the keypad's dashboard |
| Automations run in | Home Assistant | the keypad itself |
| Go to | Part 2 | Part 3 |
Most people use Home Assistant mode.
¶ Part 1: Setup (both modes)
¶ 1. Hardware at a glance
- 4x4 keypad - digits
0-9,*,#, and the control keysA,B,C,D. - Status LED - one LED that changes color/pattern to show what the keypad is doing.
- Buzzer - beeps on key presses and events.
*key - wakes the keypad from deep sleep. Hold it to exit the setup portal later.
To turn the device on for the first time, press
*.
The keypad sleeps to save battery. Pressing * wakes it; after a period of no activity it
goes back to sleep.
¶ 2. First-time setup
- Press
*to wake / power on the keypad for the first time. - On your phone, open Wi-Fi settings and look for a network called
SmartKeypad. - Connect to it. There is no password.
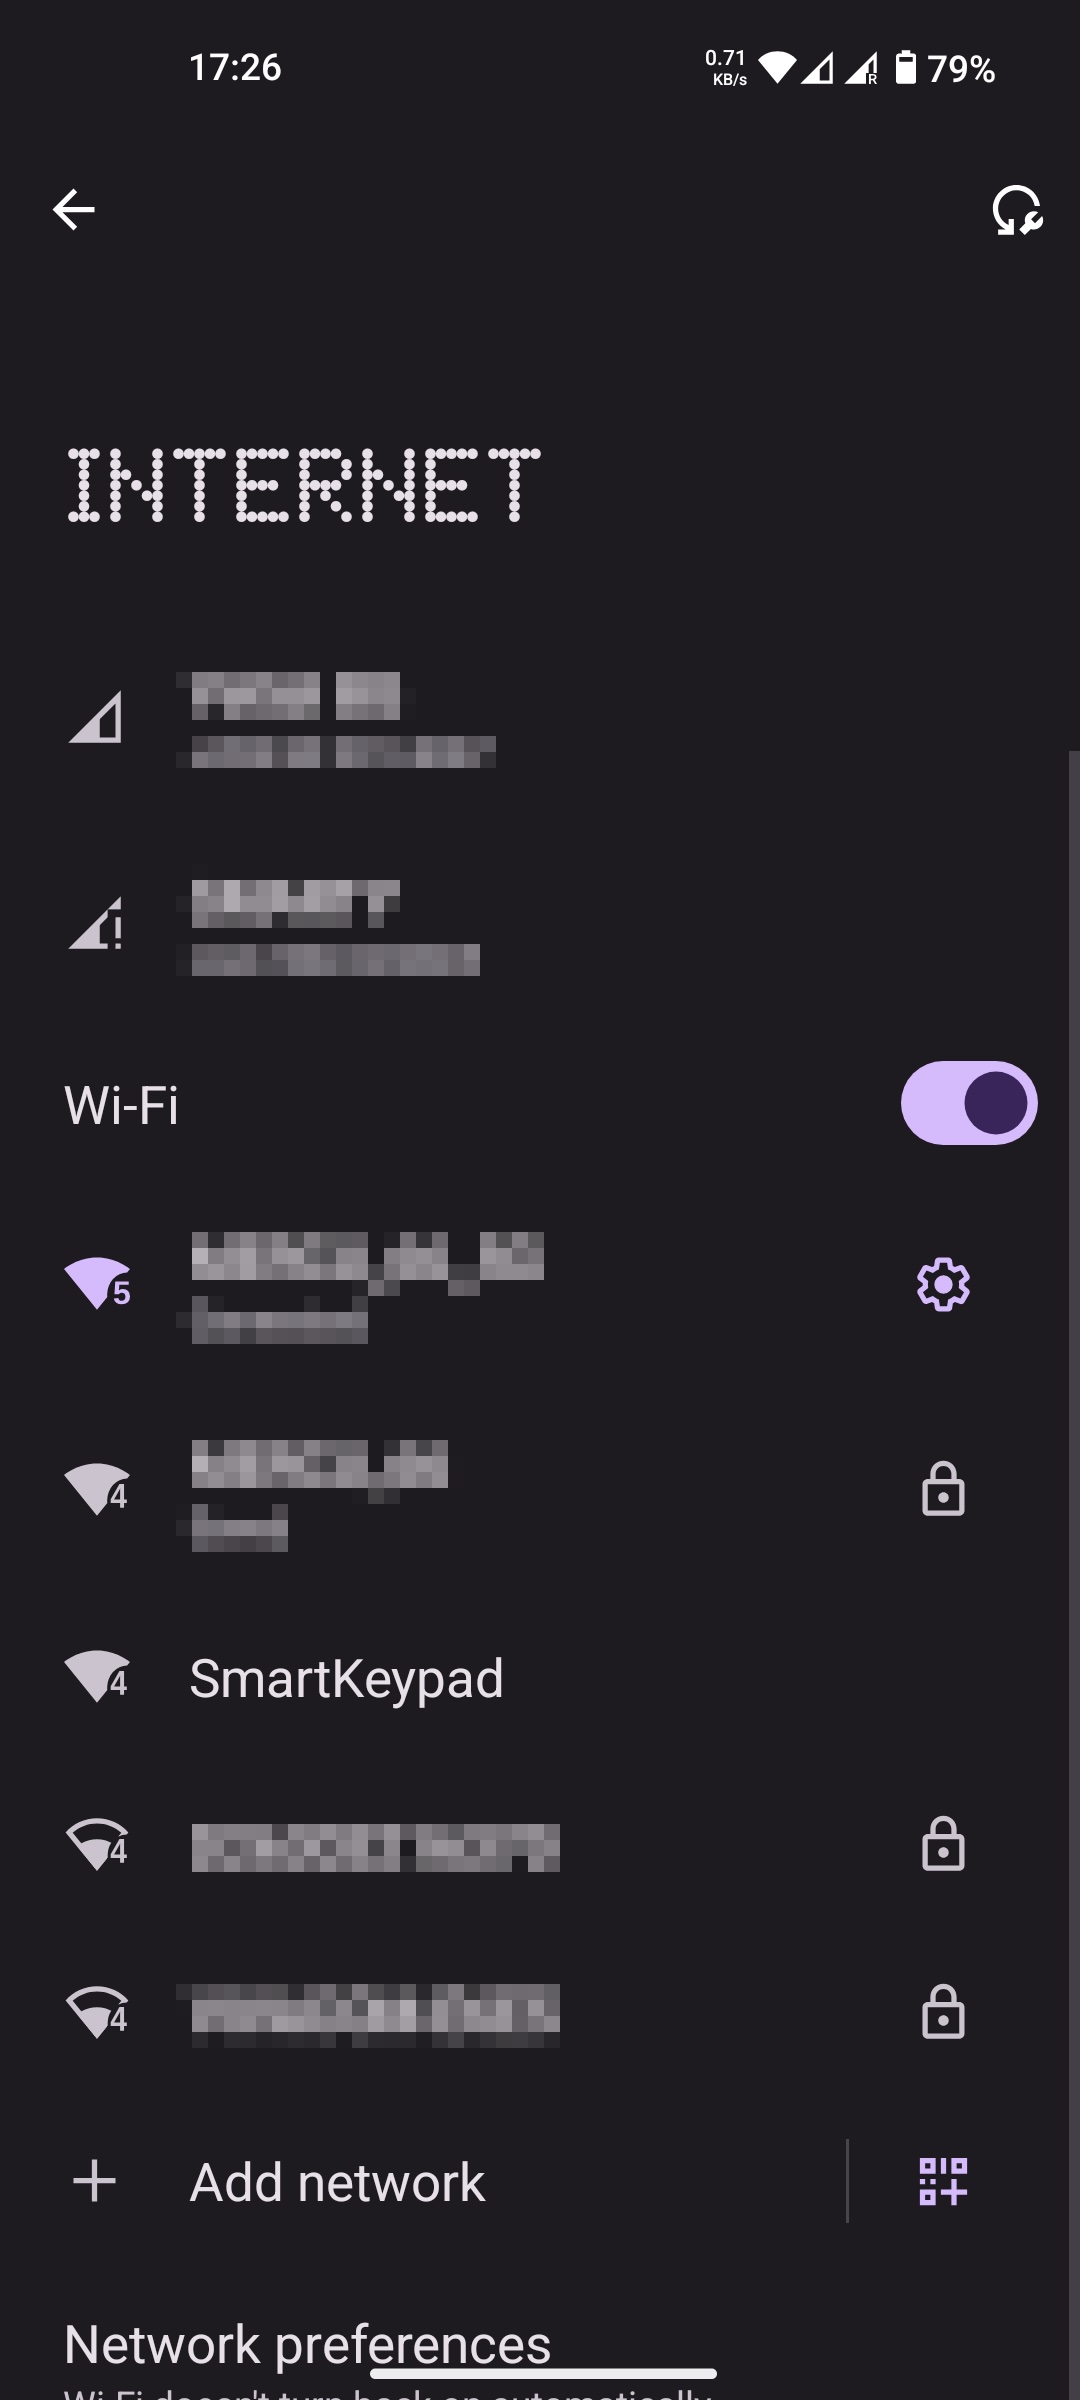
A browser window normally opens automatically (captive portal) and walks you through the
setup steps.
If the browser does not open automatically:
- Look for a notification such as "Sign in to Wi-Fi network" and tap it, or
- Open a browser manually and go to http://192.168.4.1/
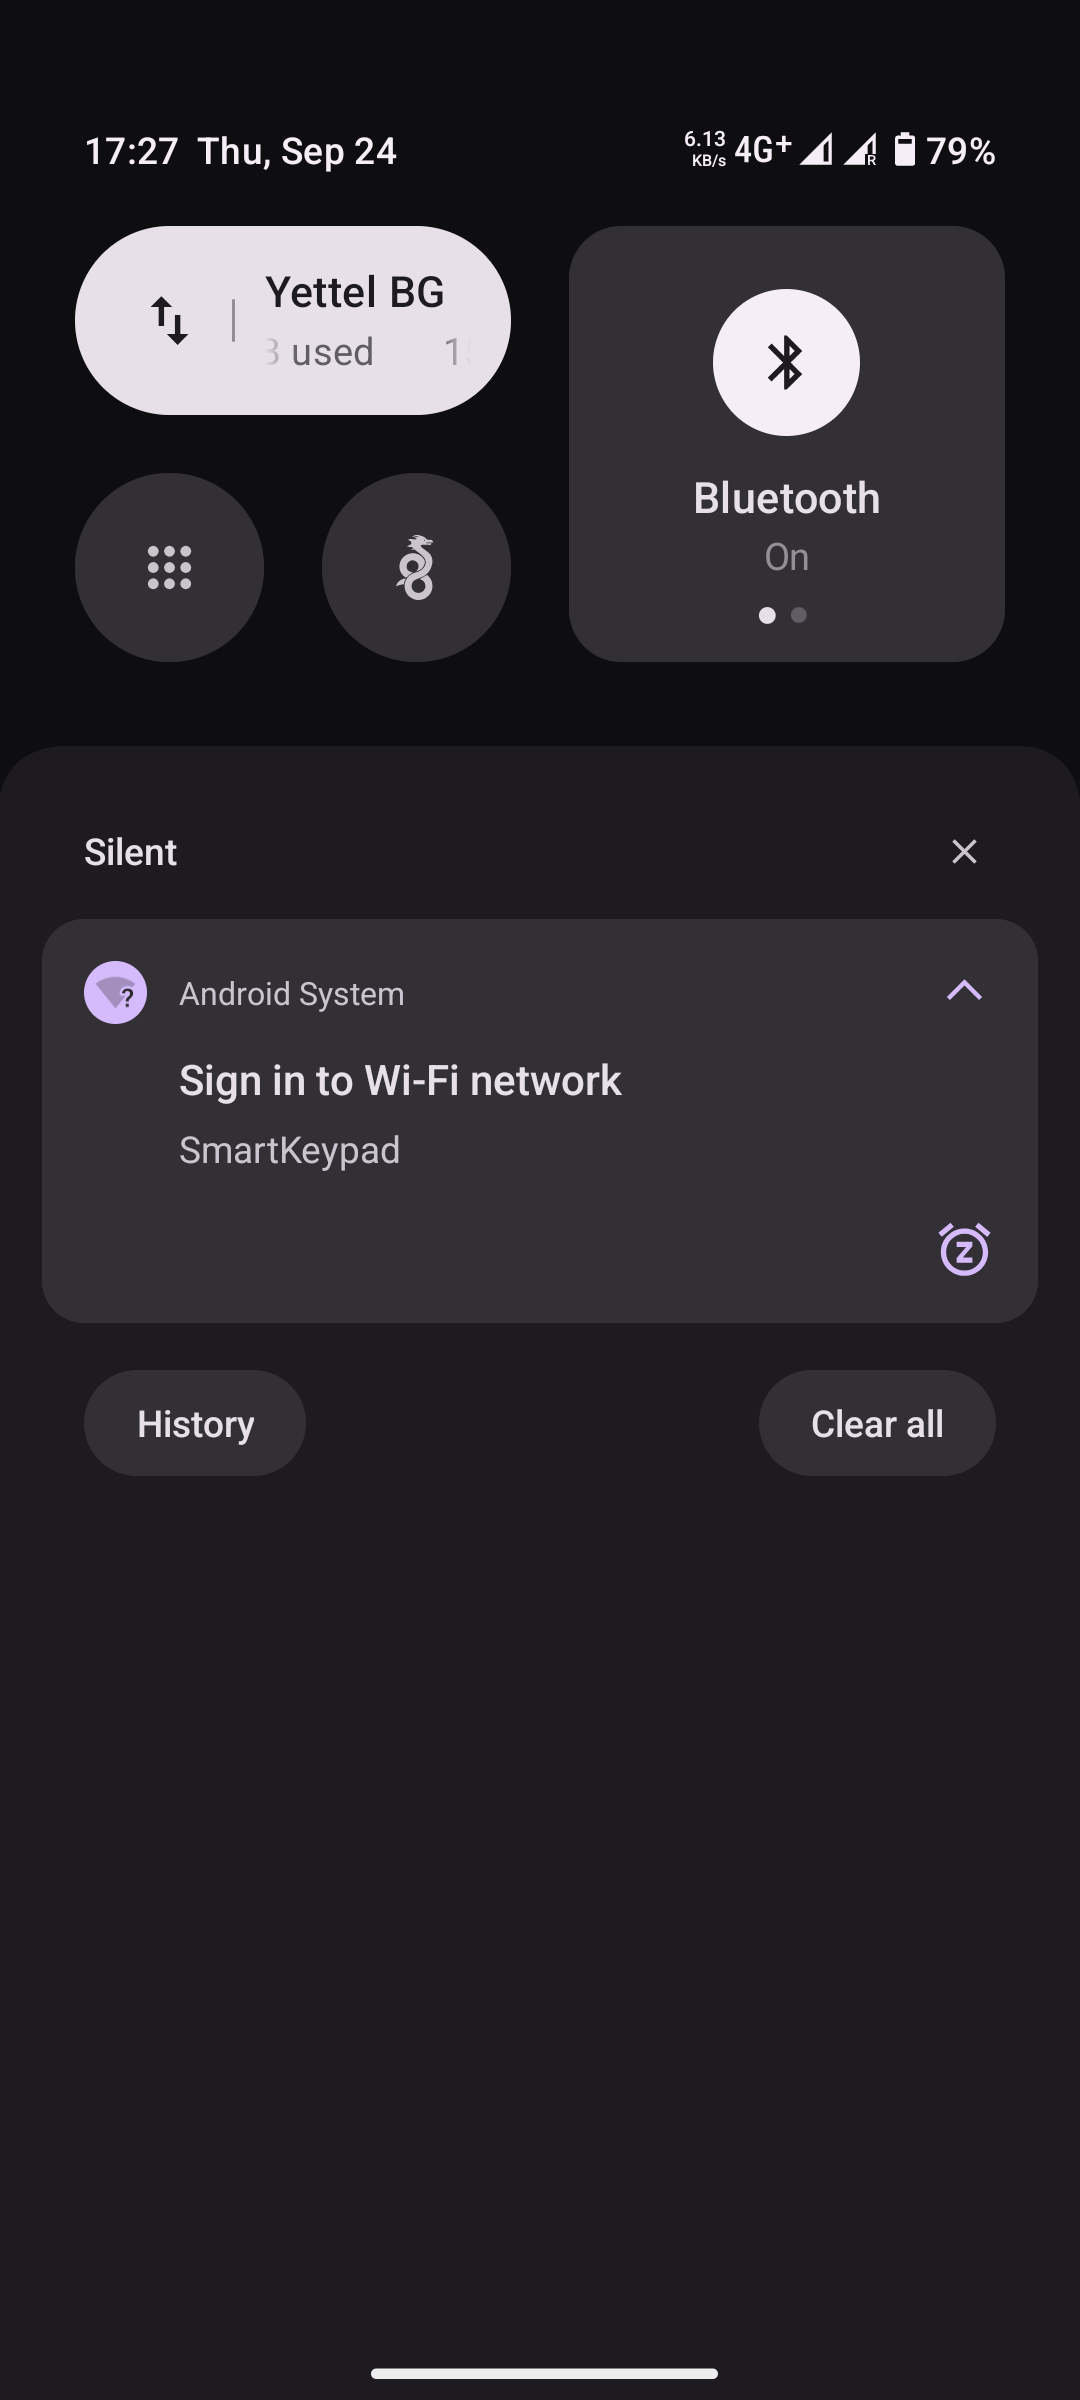
On devices that resolve mDNS (macOS, iOS, Windows with Bonjour) the portal is also
reachable at http://indiepad.local/ - most useful once the keypad is on your home
Wi-Fi (see section 6).
¶ 3. The setup wizard
The wizard is a short, ordered flow.
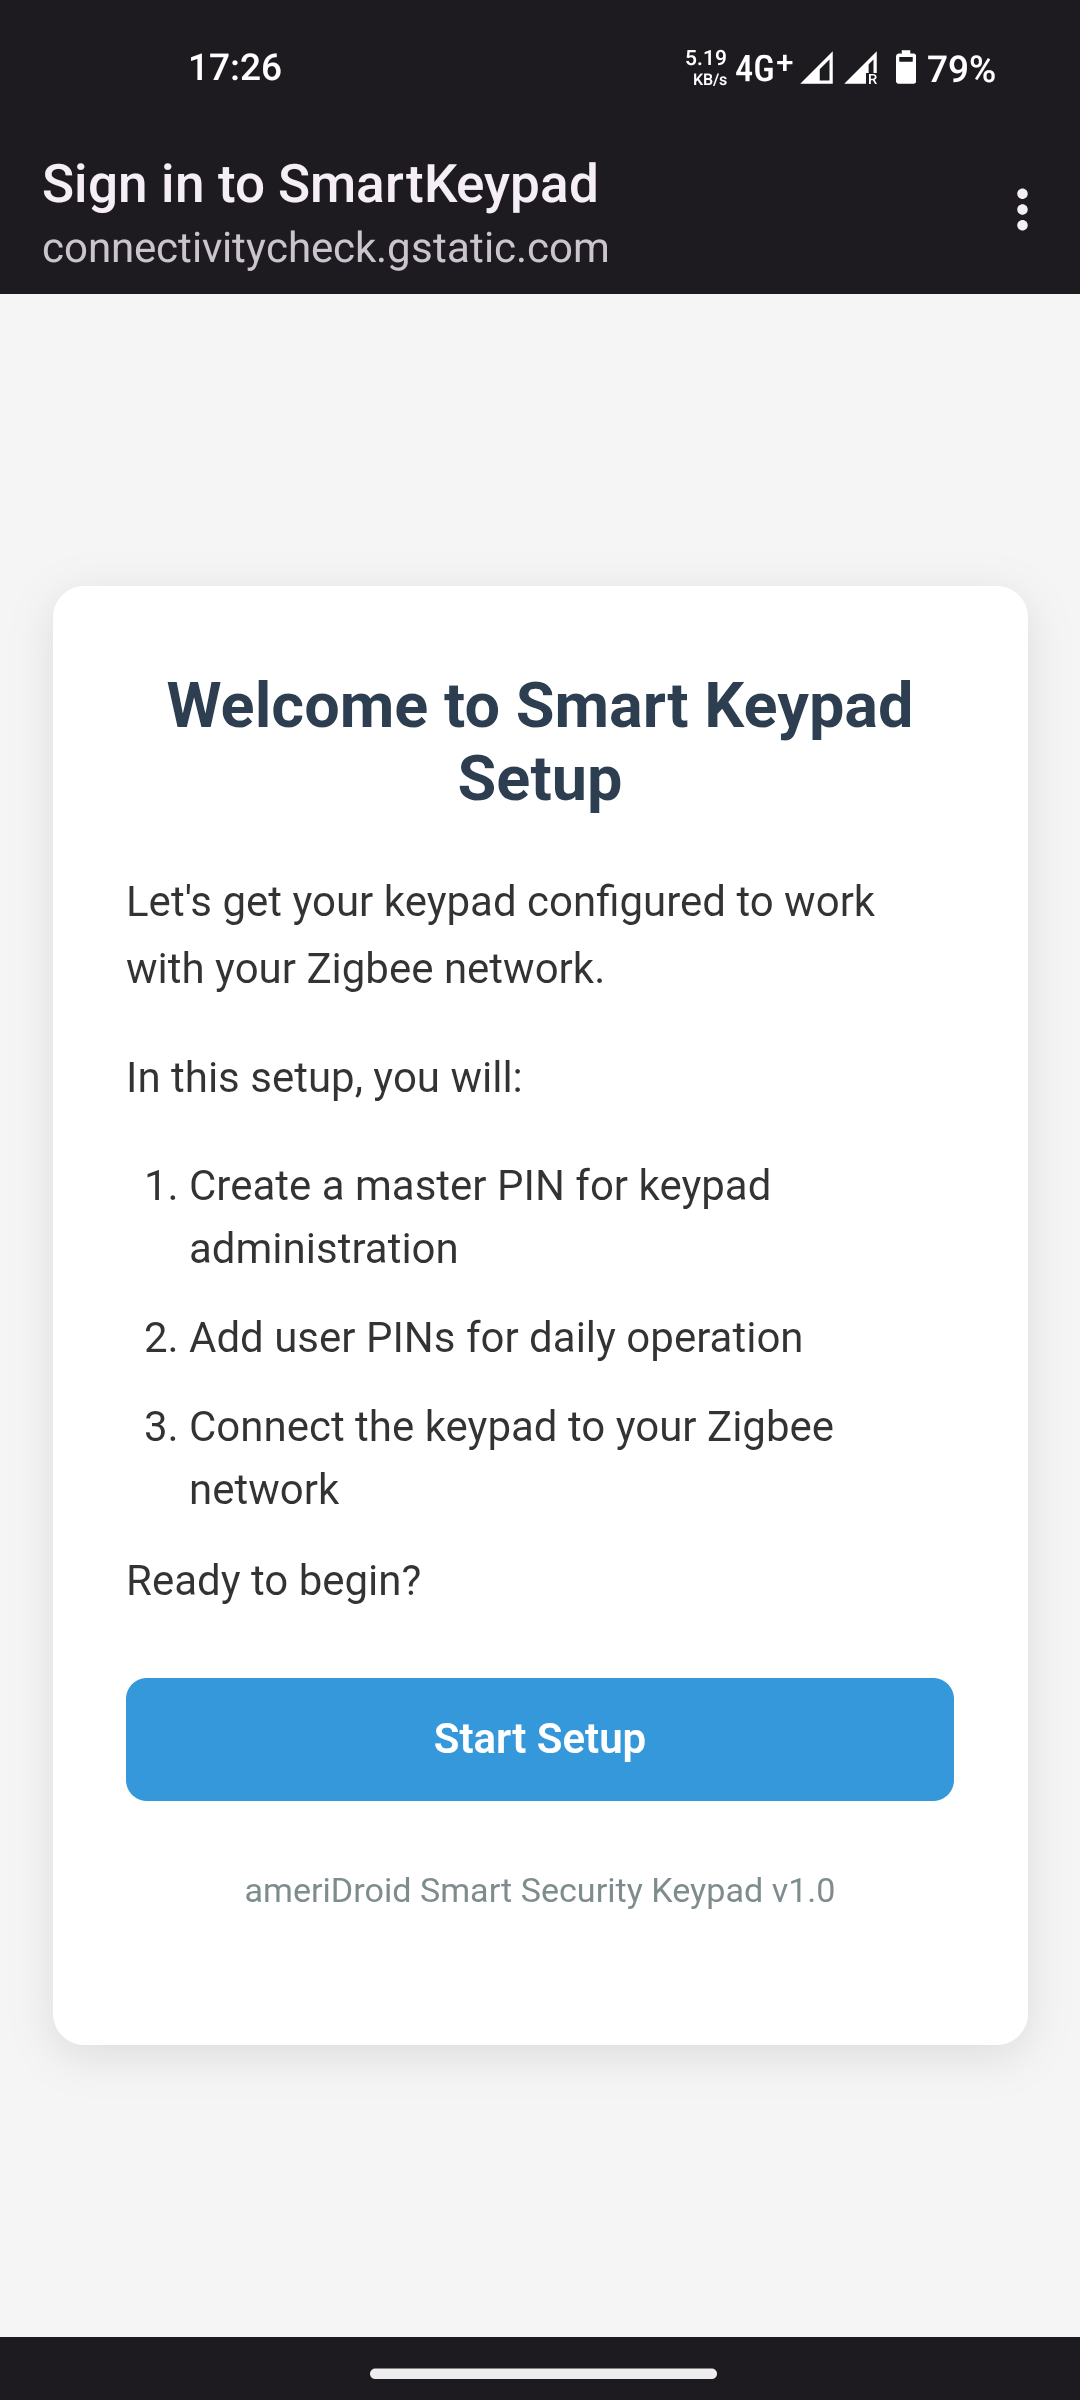
Step 1 - Welcome. Tap Start Setup.
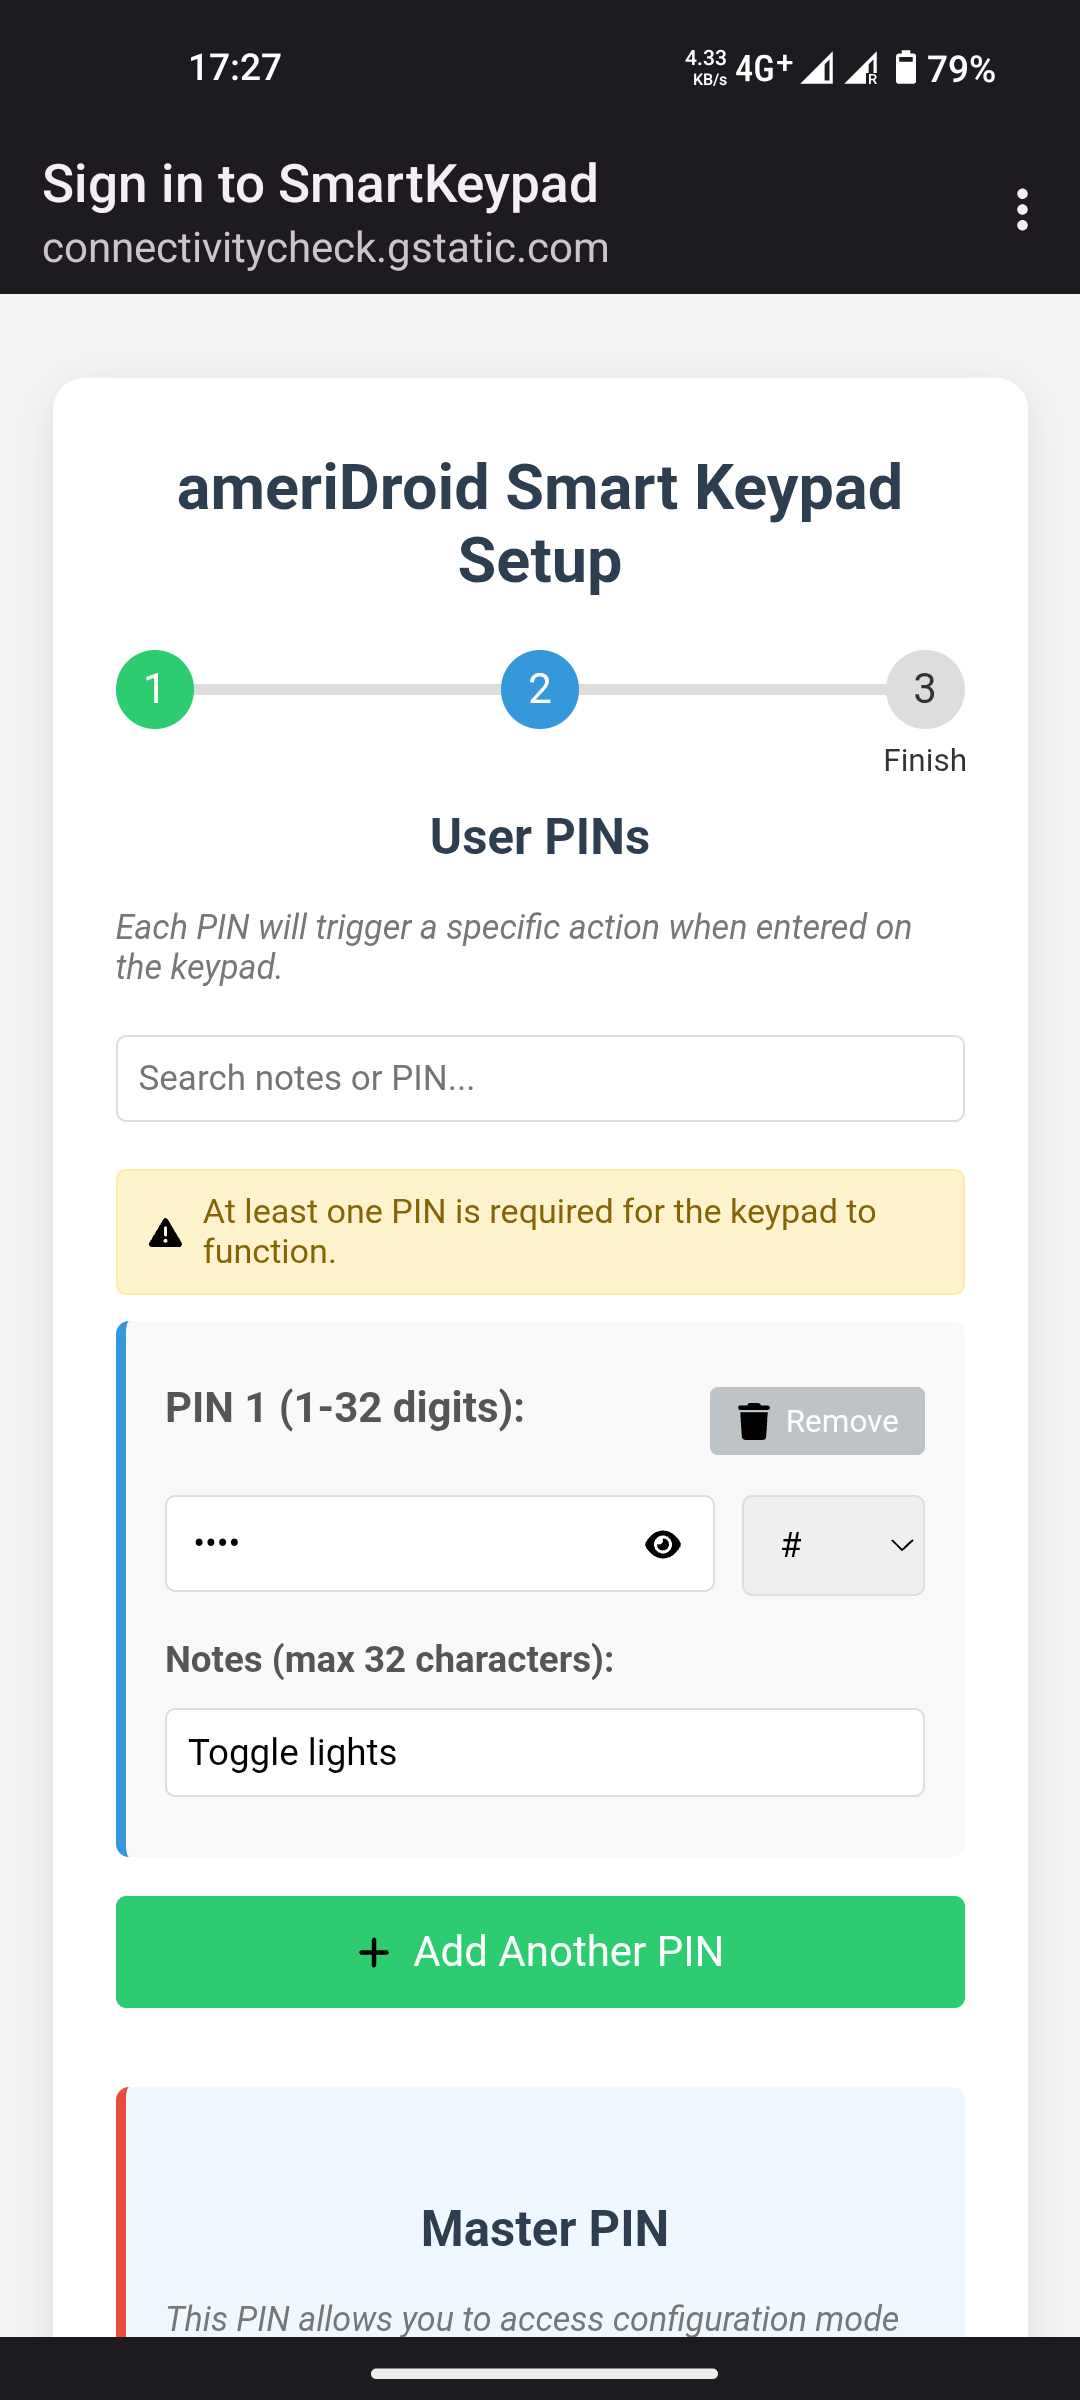
Step 2 - User PINs. Add at least one PIN. Each PIN has an end key (#, A, B, C
or D) and optional notes.
Step 3 - Master PIN and Zigbee mode. Set the master PIN and choose the Zigbee mode.
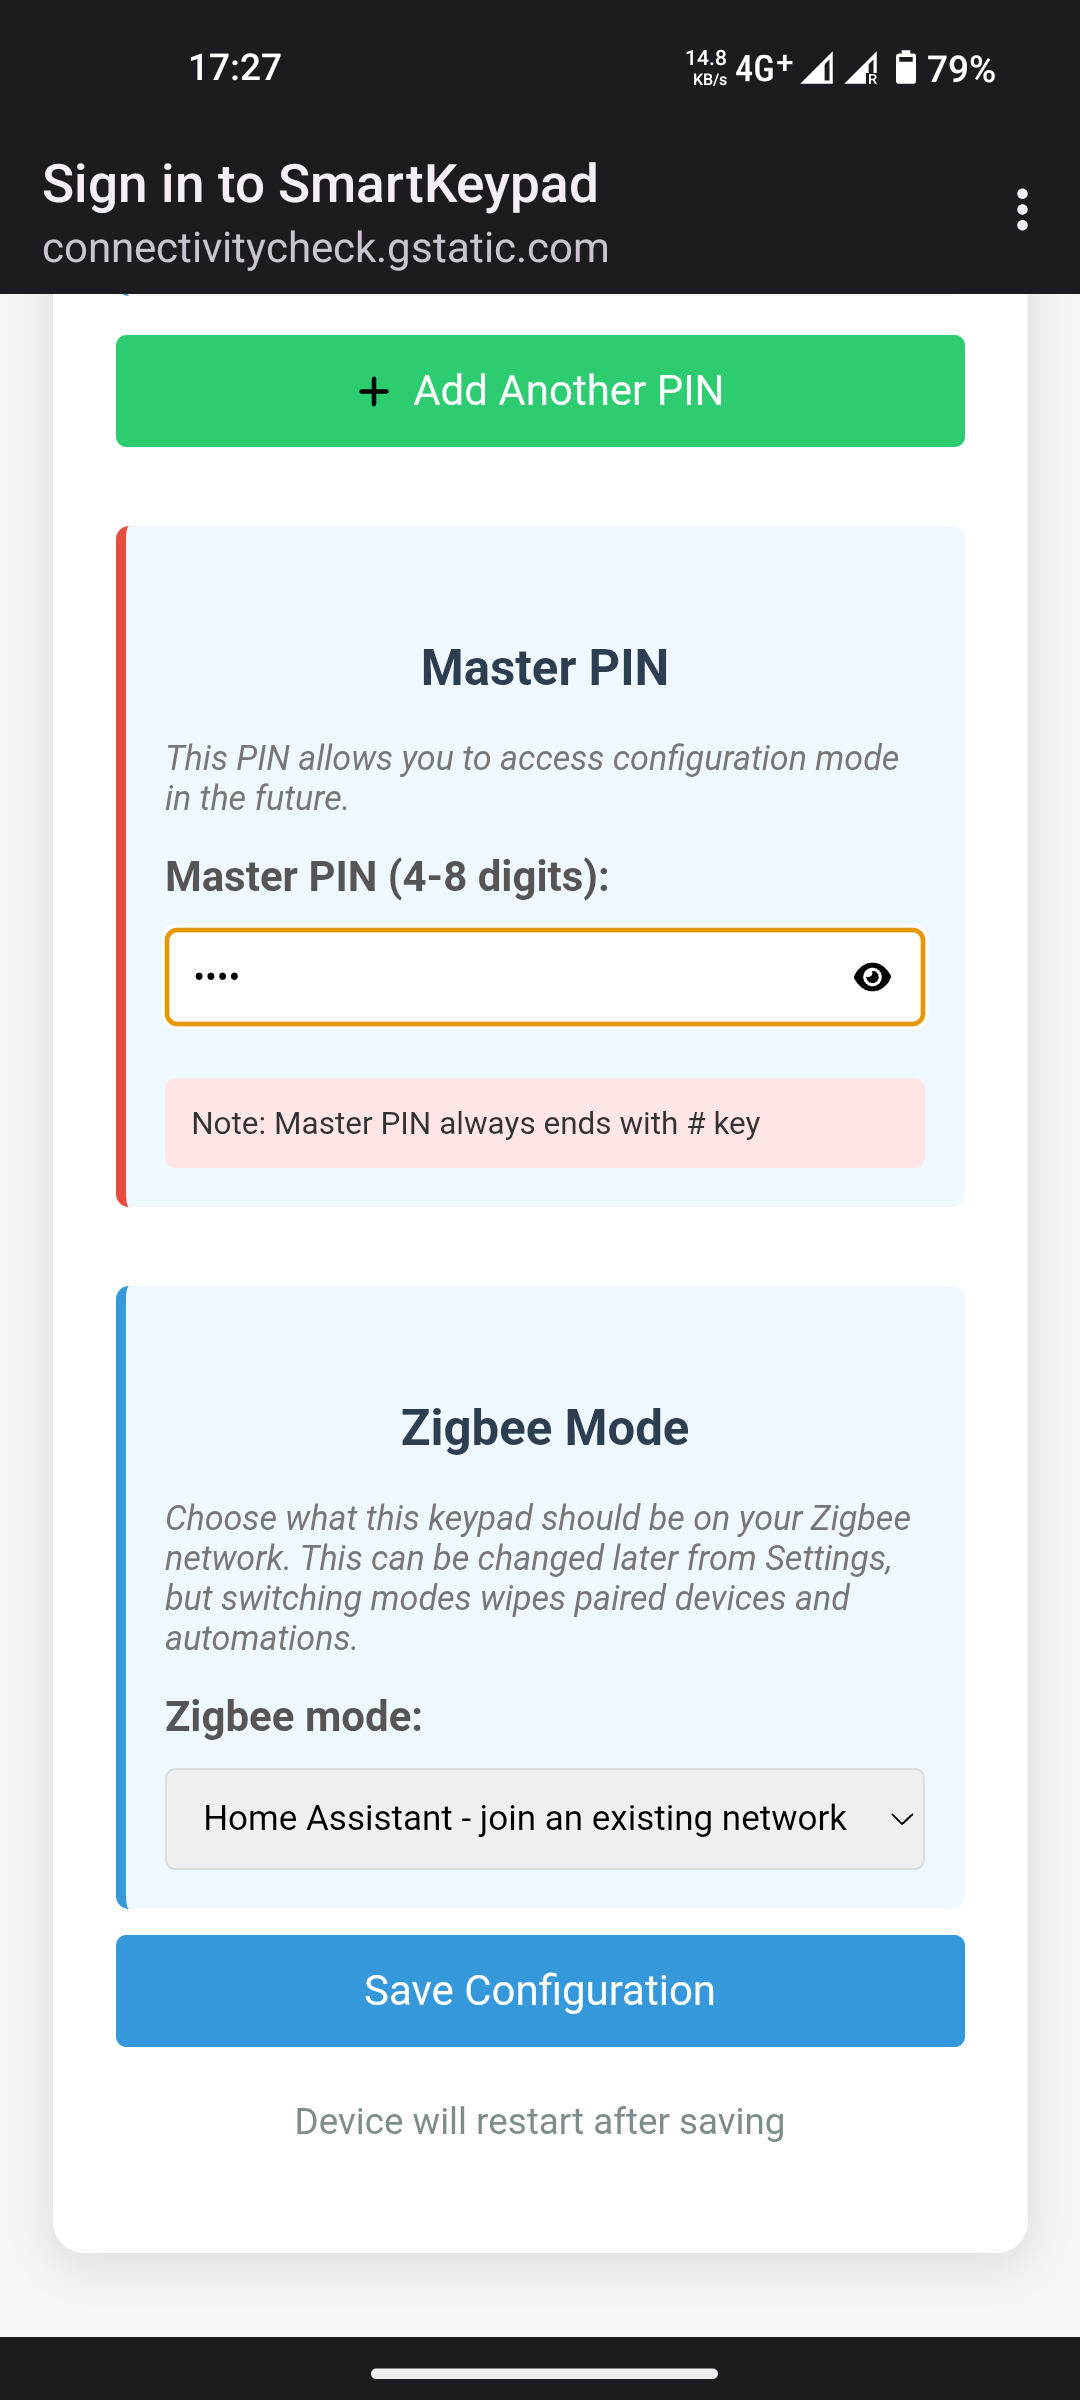
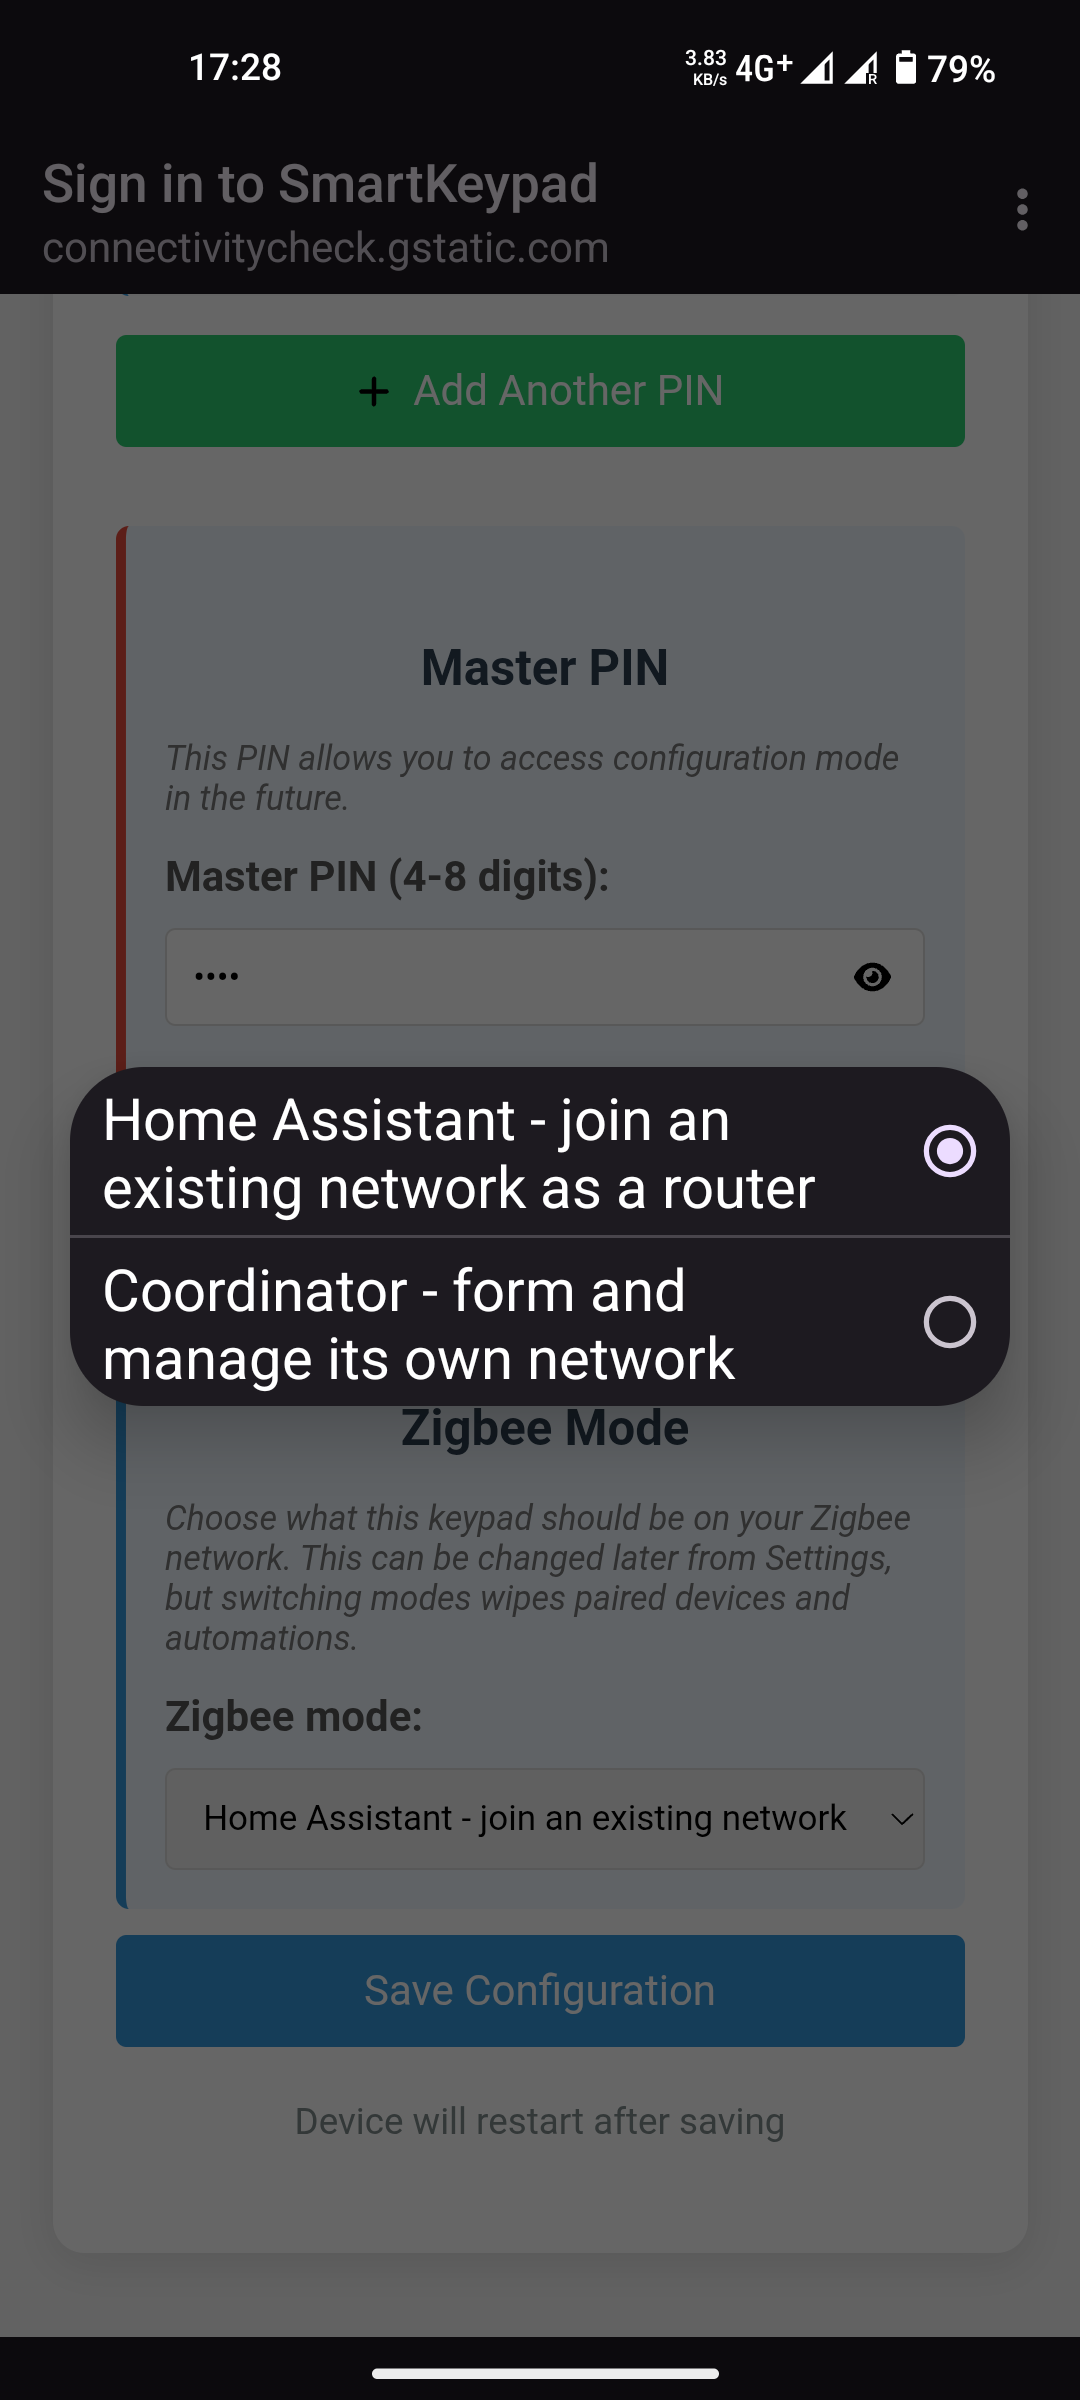
The Zigbee mode dropdown offers Home Assistant (join an existing network) or
Coordinator (form your own network):
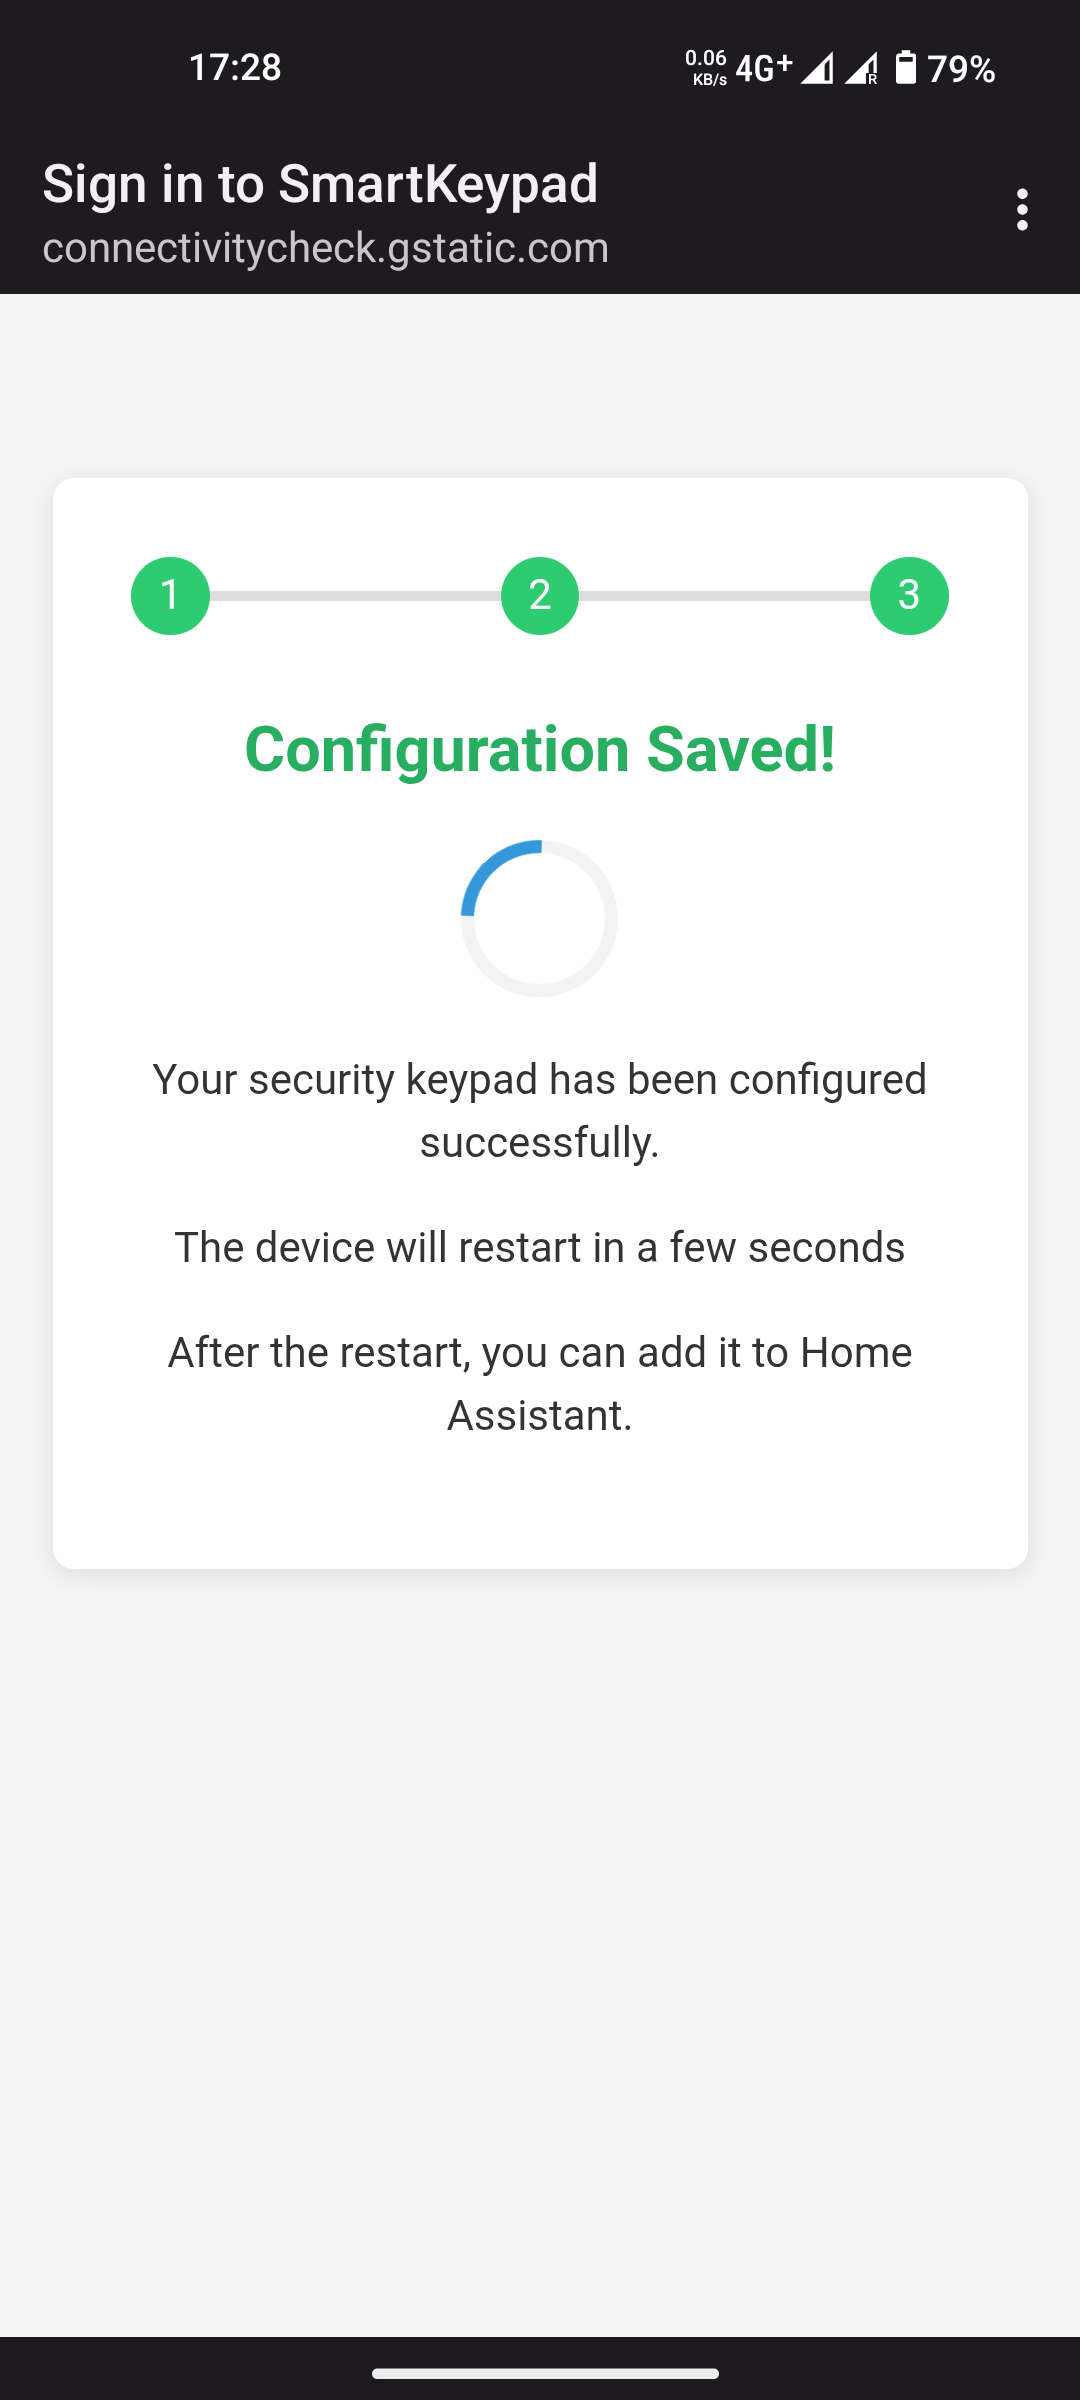
Step 4 - Save. In HA mode the keypad reboots after saving.
What next? Your keypad is set up. Continue with the part for the mode you chose:
- Home Assistant - Part 2: Home Assistant mode
- Coordinator - Part 3: Coordinator mode
The rest of Part 1 explains PINs, the master PIN and the dashboard in more detail.
¶ 4. PINs explained
A PIN is a code a person types on the keypad. Each PIN is tied to a switch number
(1-1024).
- PINs are 1-32 digits.
- A PIN ends with an end key:
#,A,B,CorD.#is the default. - Each PIN has a switch number - when that PIN is entered, the keypad reports that
number over Zigbee (the Active Pin Number endpoint, see section 9).
Example: create PIN 1234 with end key #. When someone types
1234# on the keypad, Home Assistant sees "switch 1 entered" and you can build an
automation for exactly that event.
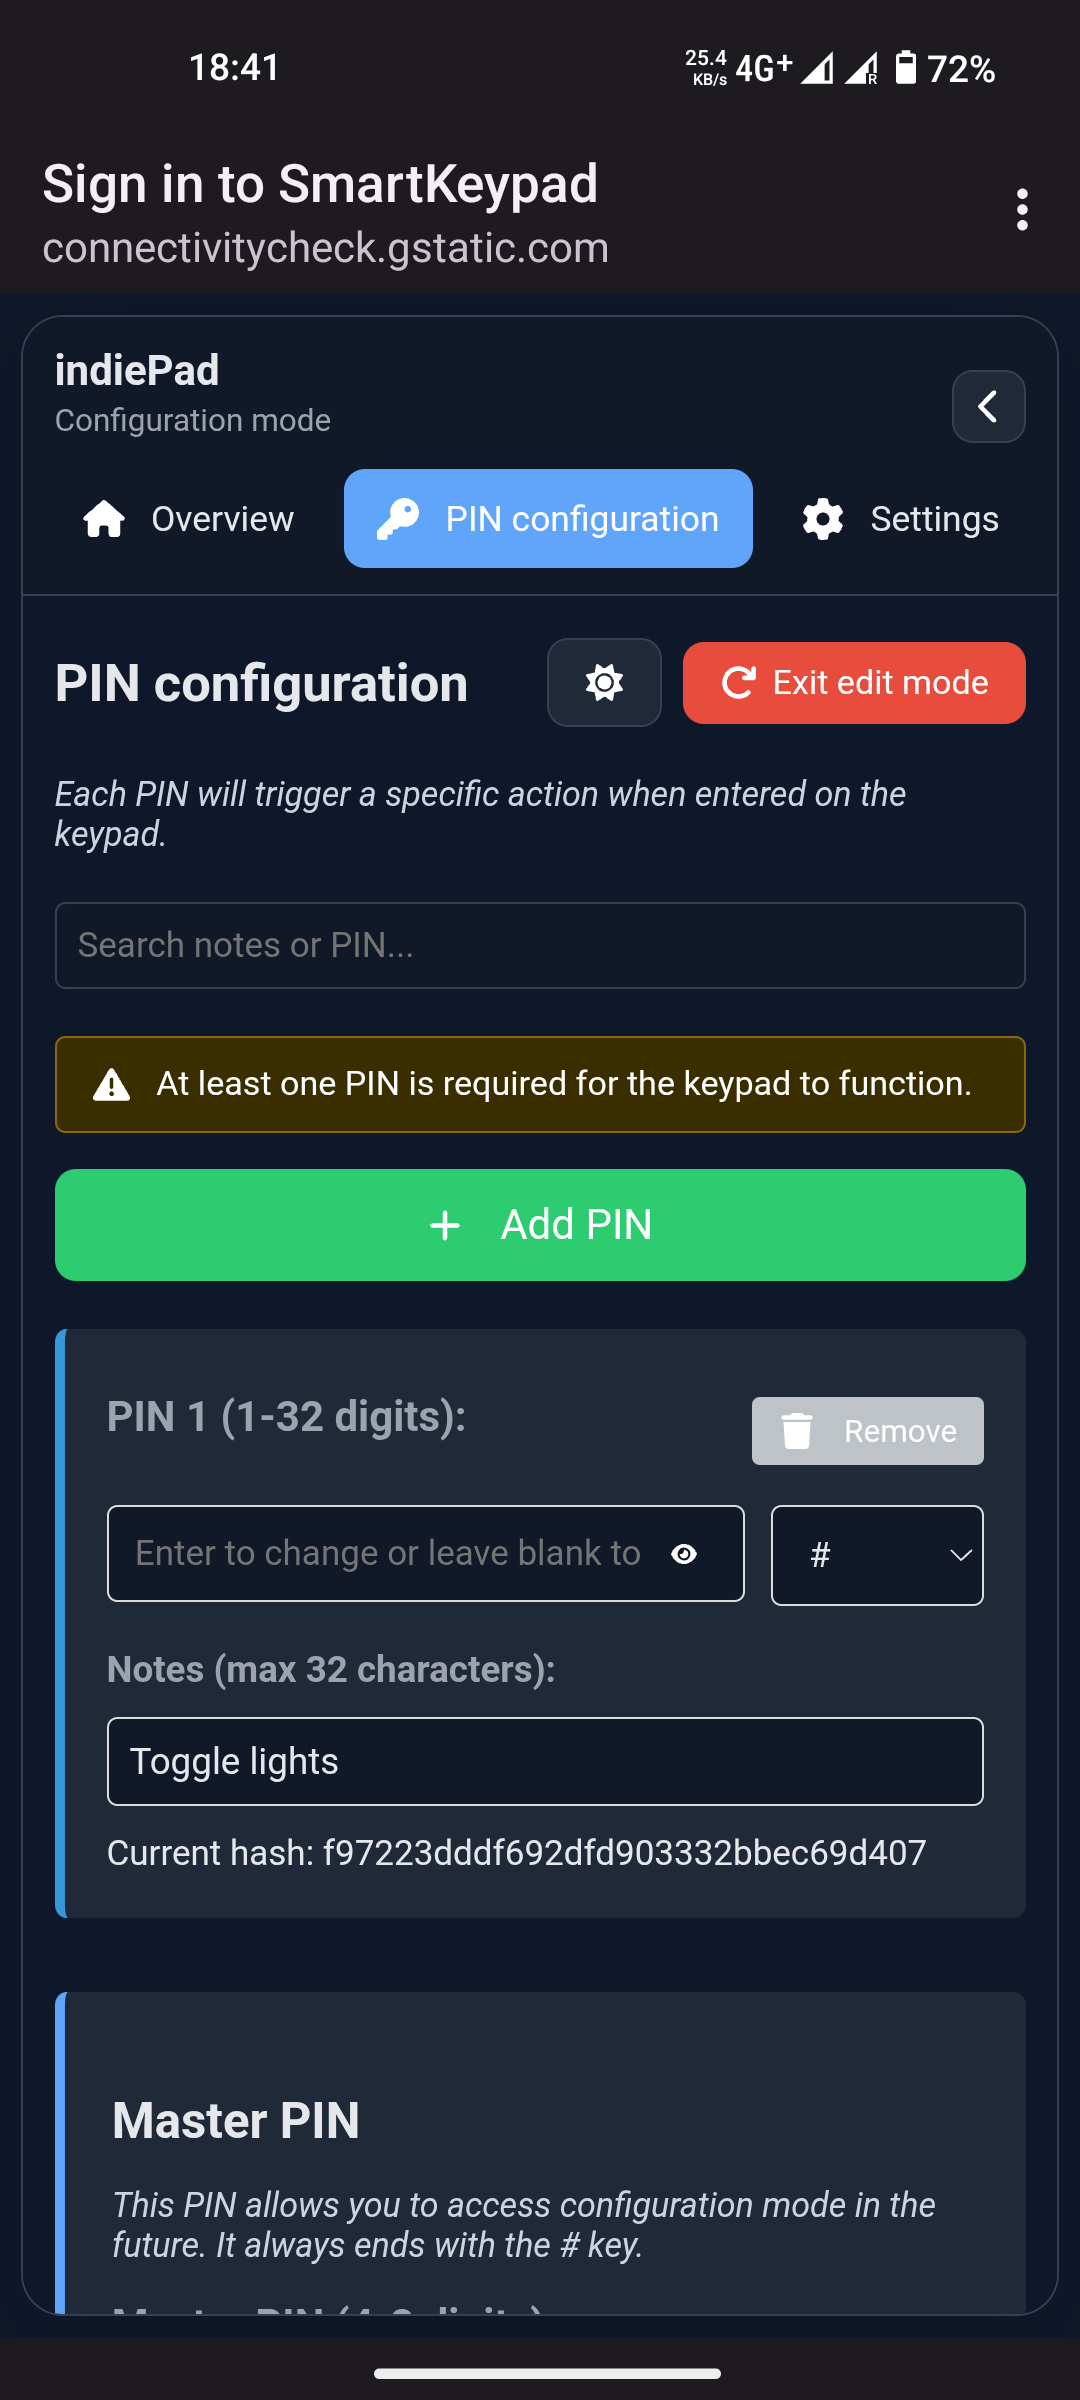
PINs are stored as hashes (not plaintext) in the keypad's memory. You can edit them any
time in the portal's PIN configuration tab:
¶ 5. Master PIN explained
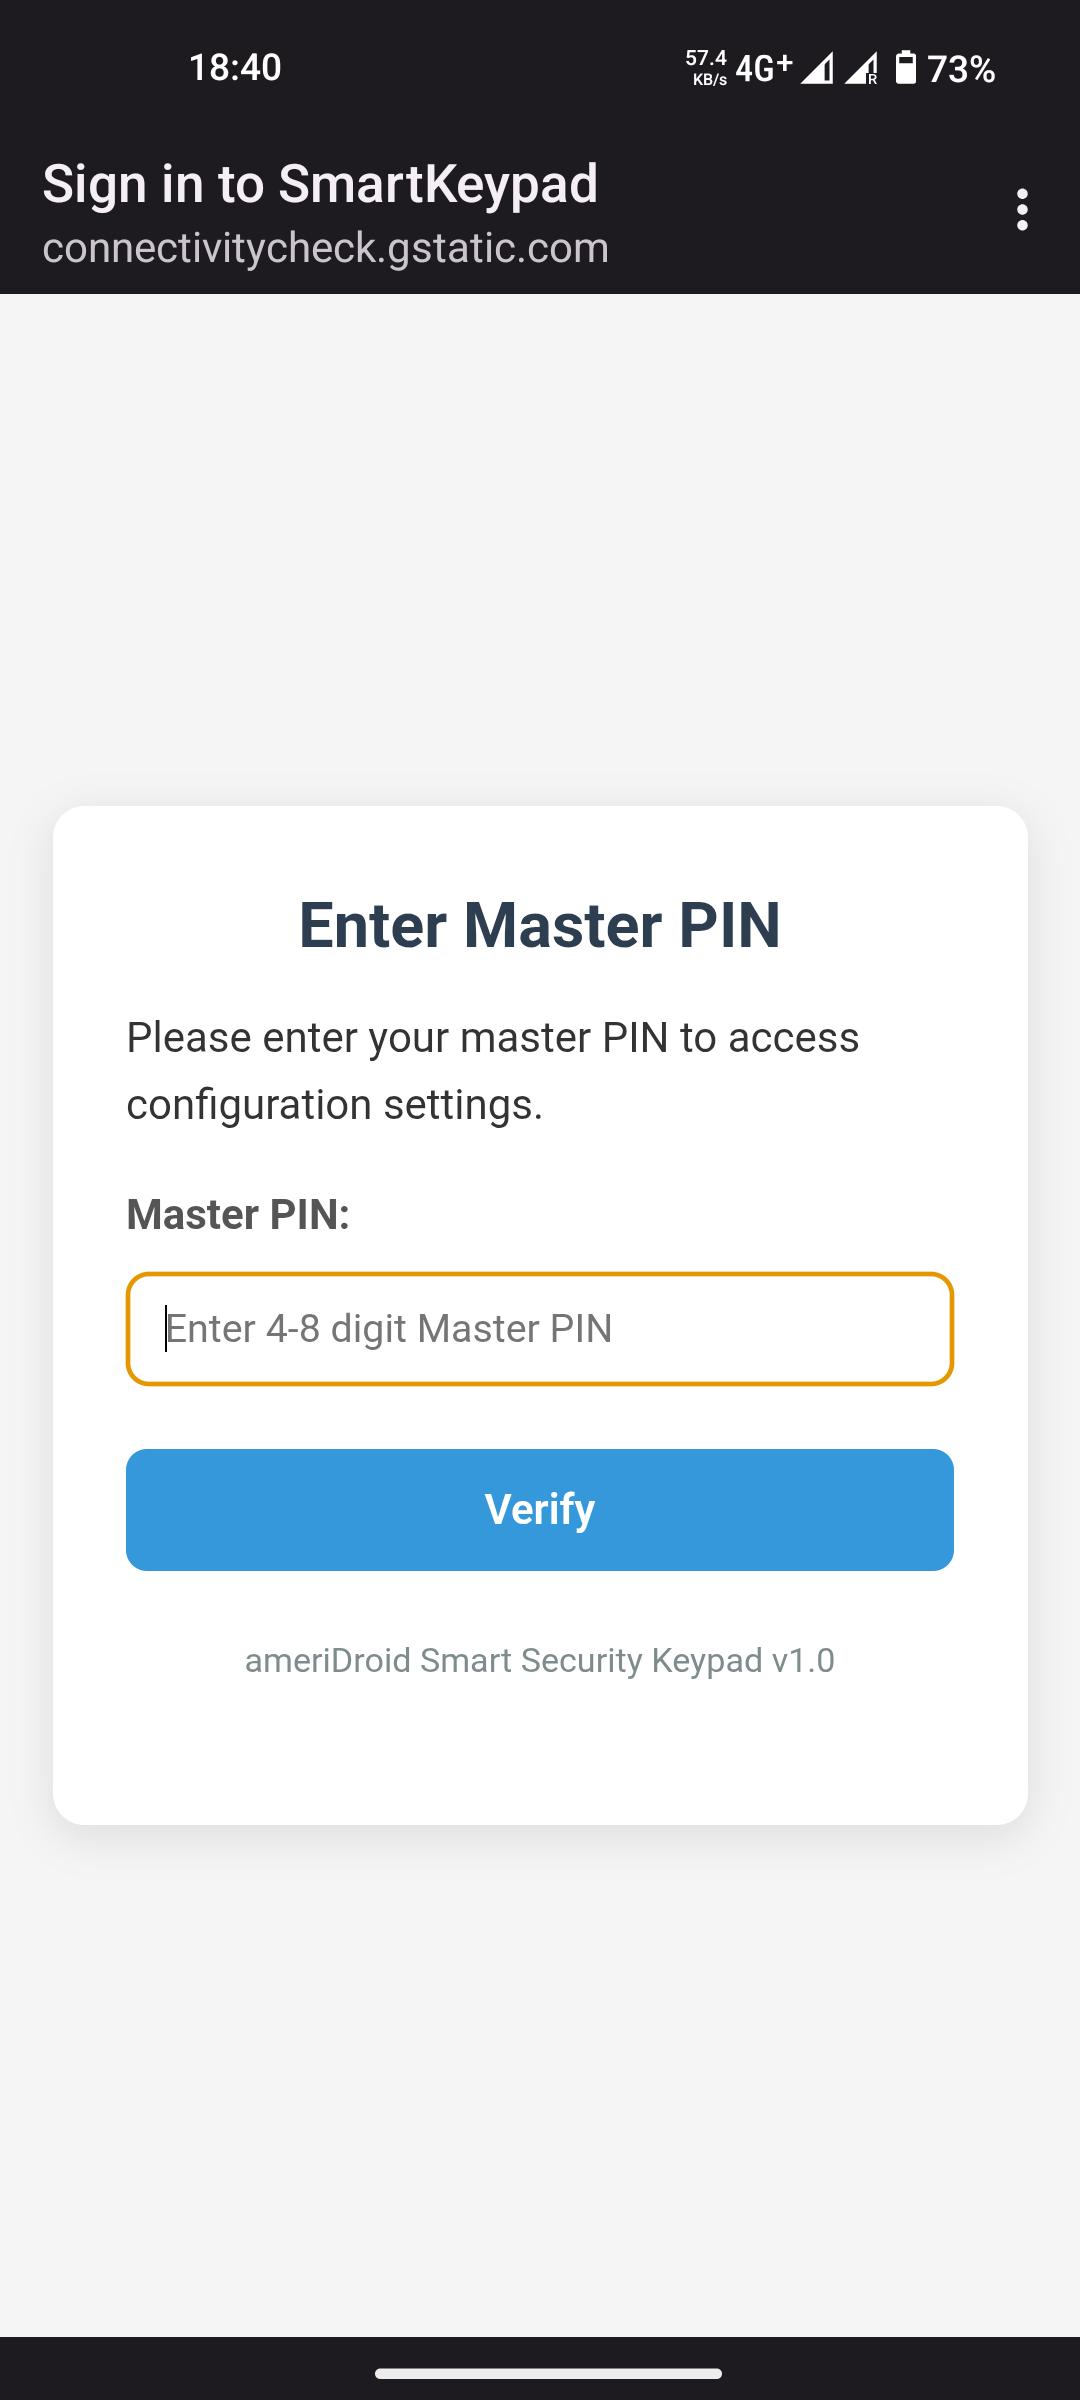
The master PIN is the administrator code, separate from user PINs.
- It is 4-32 digits and always ends with
#when typed on the keypad. - Entering the master PIN on the keypad (
<master pin>#) opens the configuration portal
(edit mode). - In the portal it is also the login password for the dashboard.
Use the master PIN to change PINs, Wi-Fi settings, sleep time, or switch Zigbee modes. Treat
it like a safe key - anyone who knows it can change the keypad's configuration, including
every user PIN. Make it at least as long as your longest user PIN; a long user PIN is only as
safe as the master PIN that can change it.
¶ 6. Reaching the portal: AP vs your home Wi-Fi
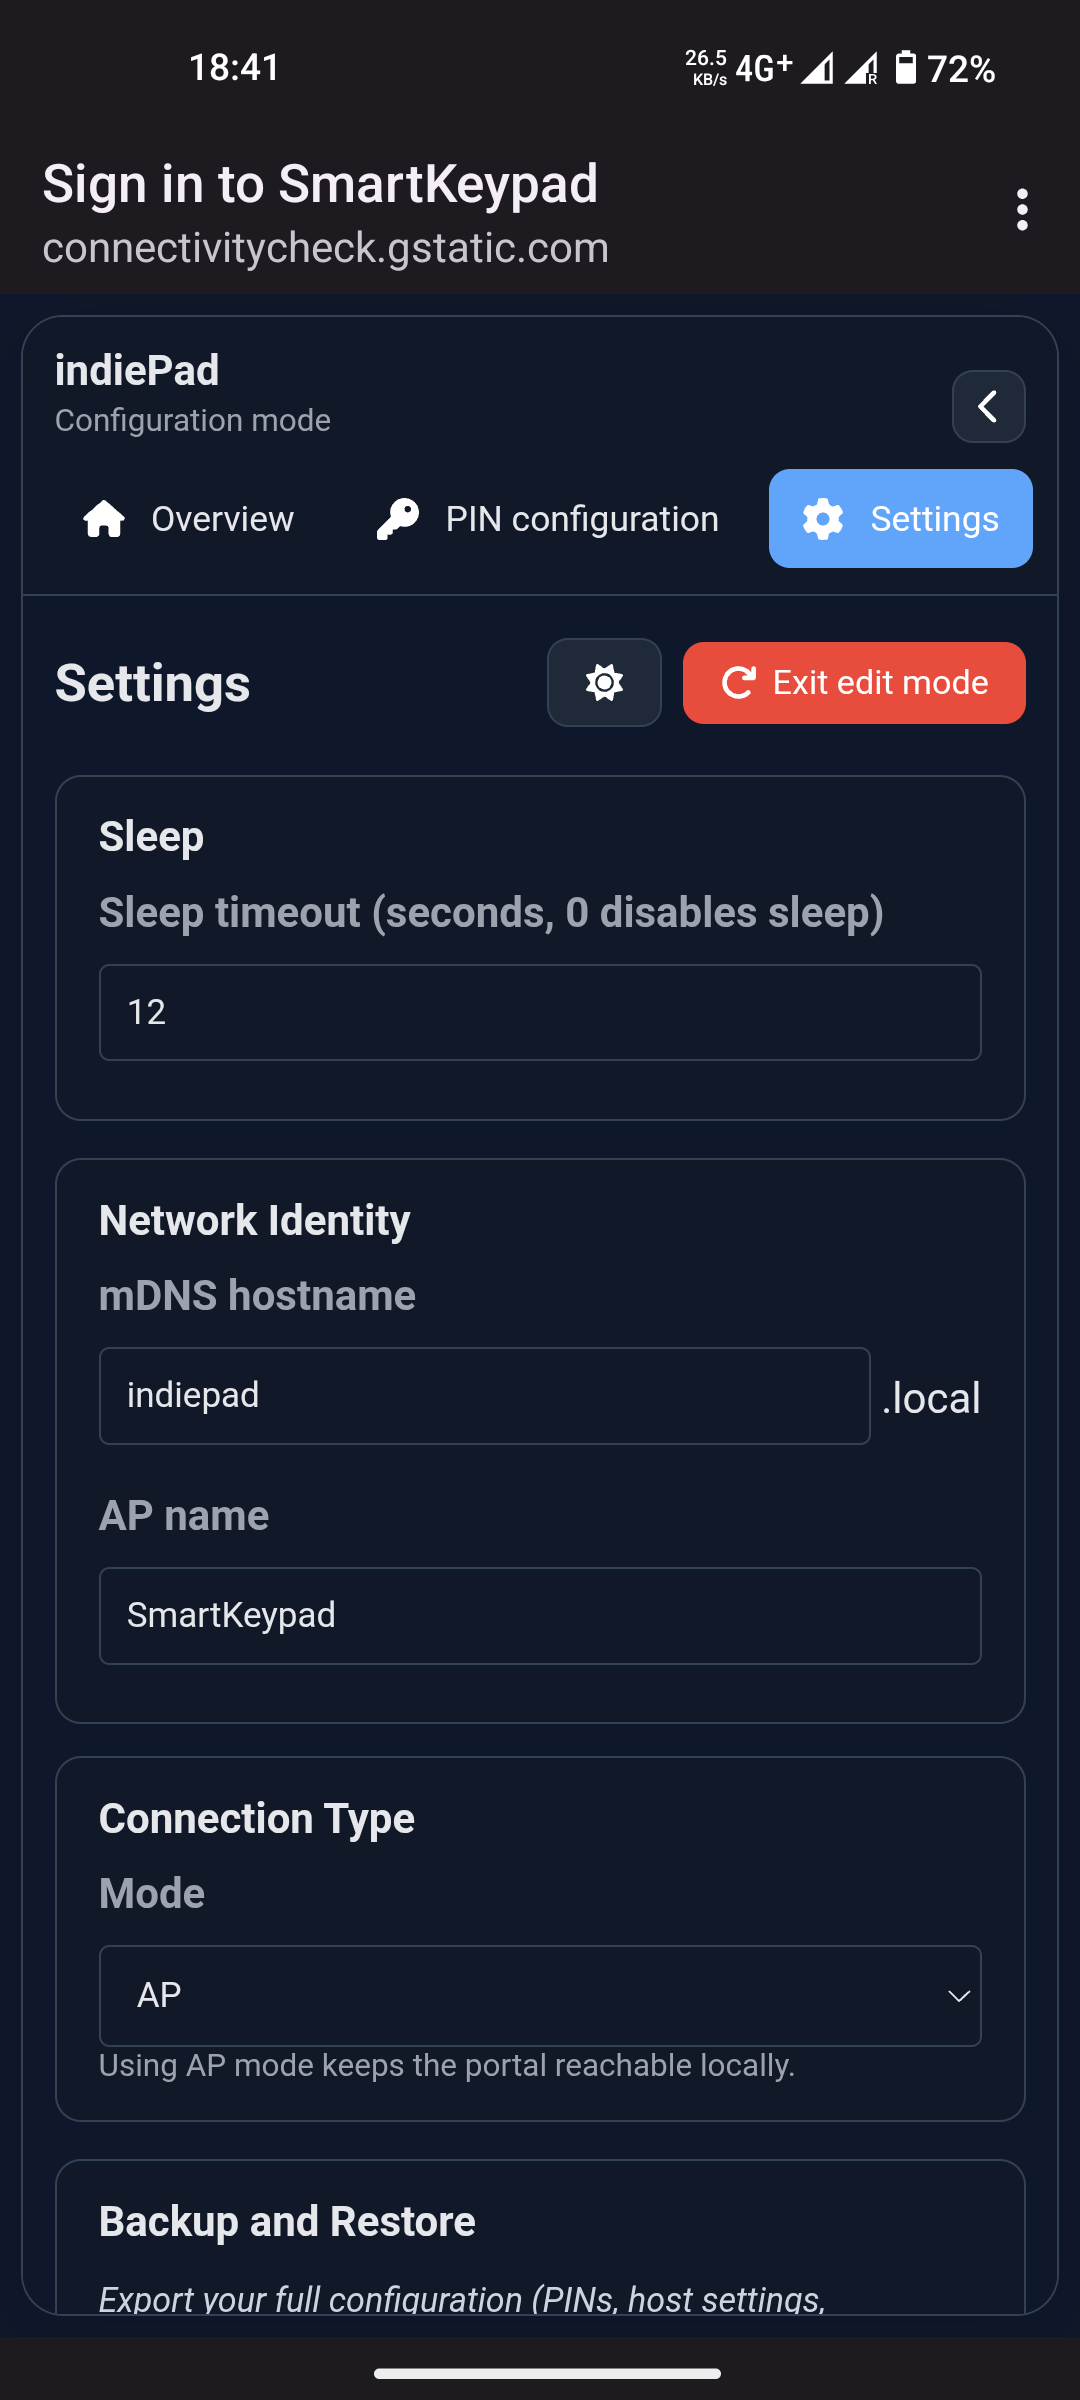
By default the portal runs as its own Wi-Fi network (AP mode, reachable at
http://192.168.4.1). You can instead connect the keypad to your home Wi-Fi, which lets you
reach the portal from any device on that network without switching networks.
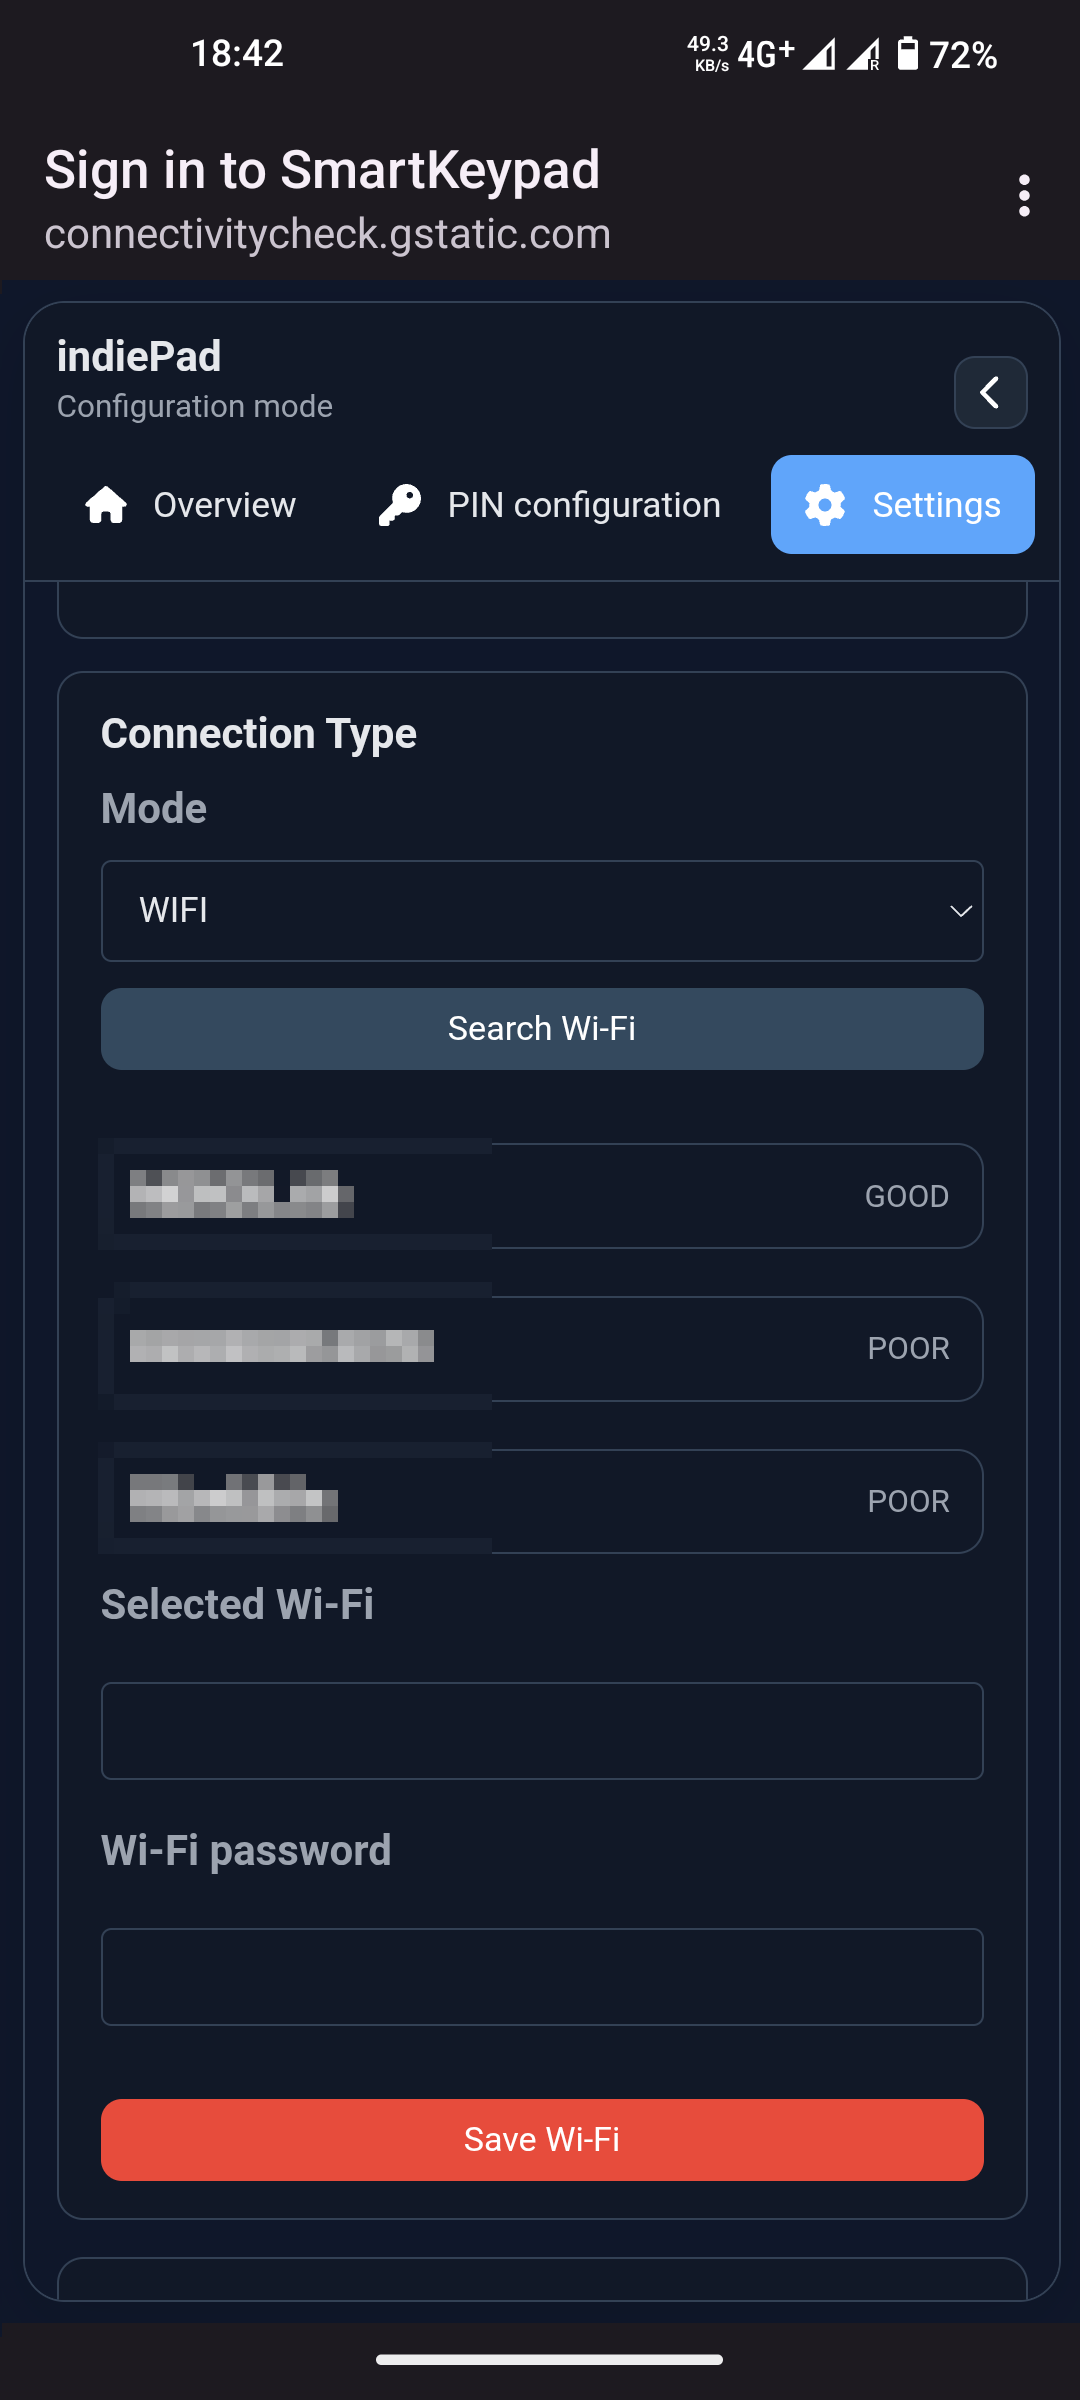
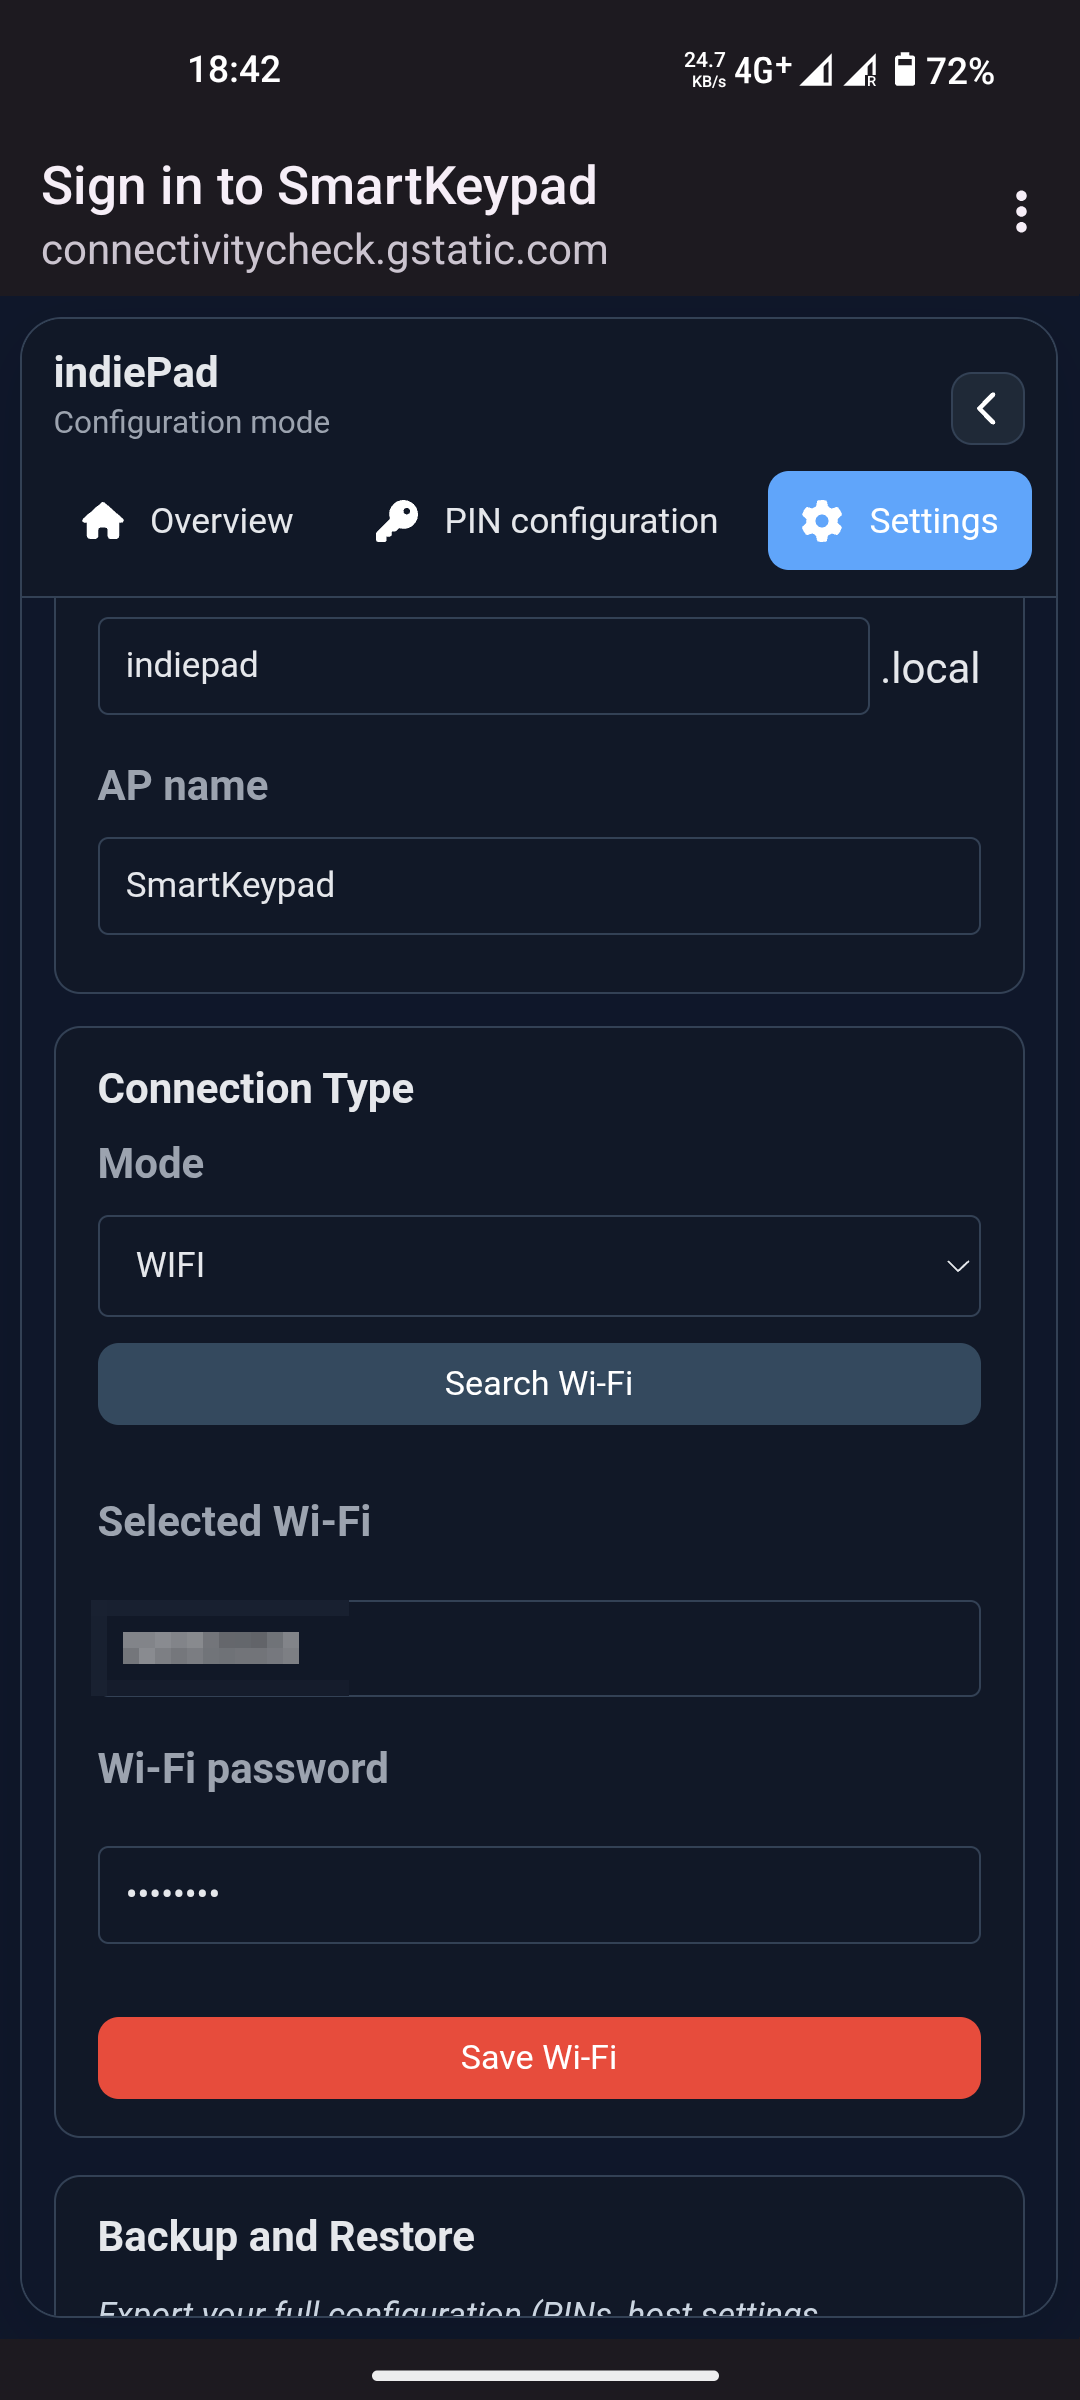
In Settings, set Connection Type > Mode to WIFI, tap Search Wi-Fi, pick your
network and enter its password:
After saving, the keypad joins your Wi-Fi. The portal is then reachable at:
- http://indiepad.local/ (mDNS - macOS/iOS/Windows-with-Bonjour), or
- the IP address your router assigned it (see Overview > Network Status, or check your
router's client list).
The dashboard keeps the portal awake while a browser is actively using it.
¶ 7. Keypad web dashboard
The portal doubles as the keypad's dashboard. After logging in with the master PIN you get:
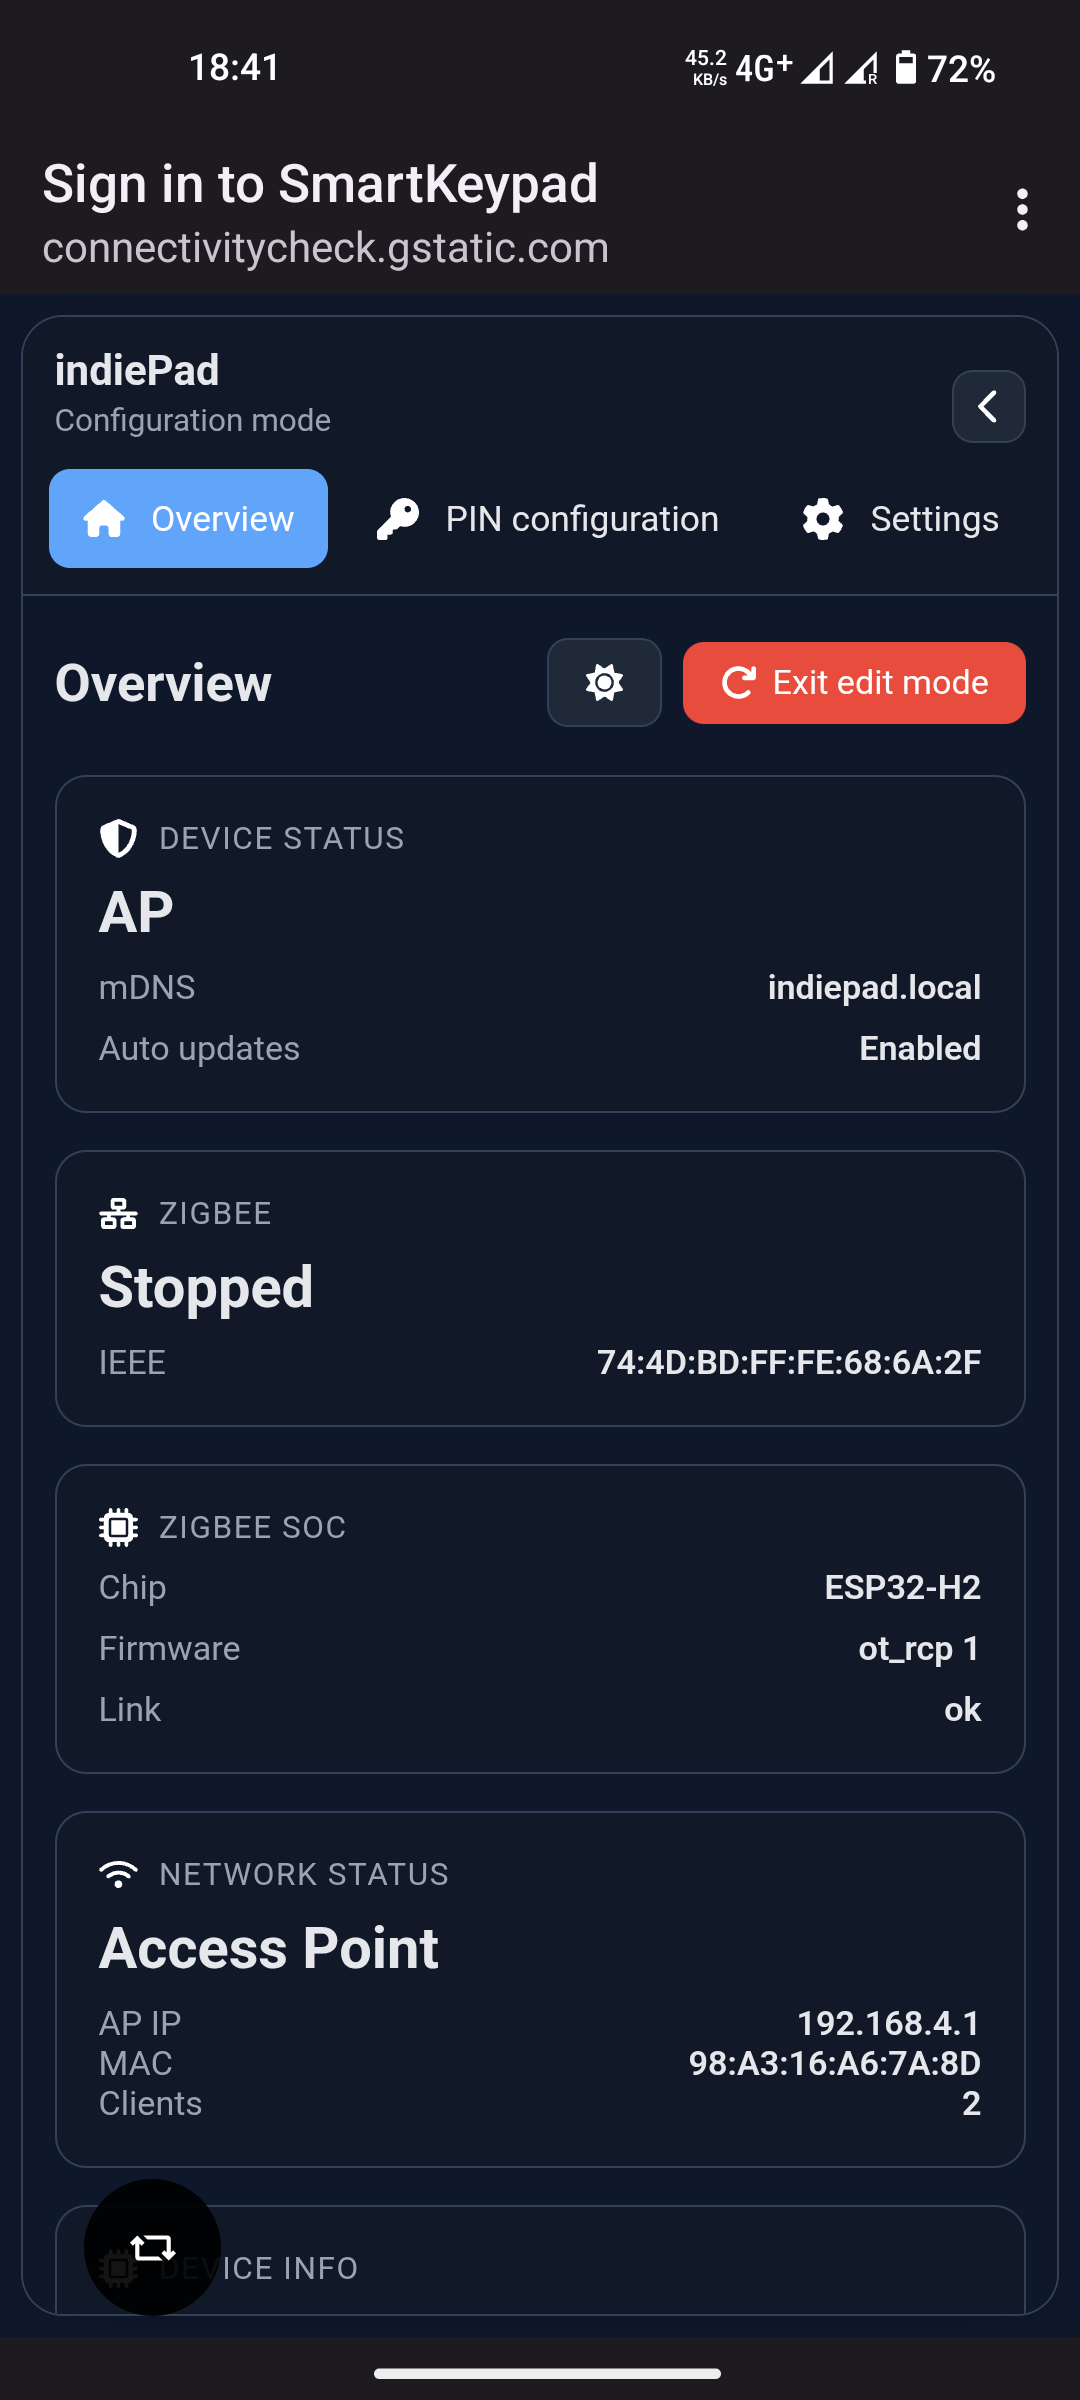
- Overview - device, Zigbee and network status.
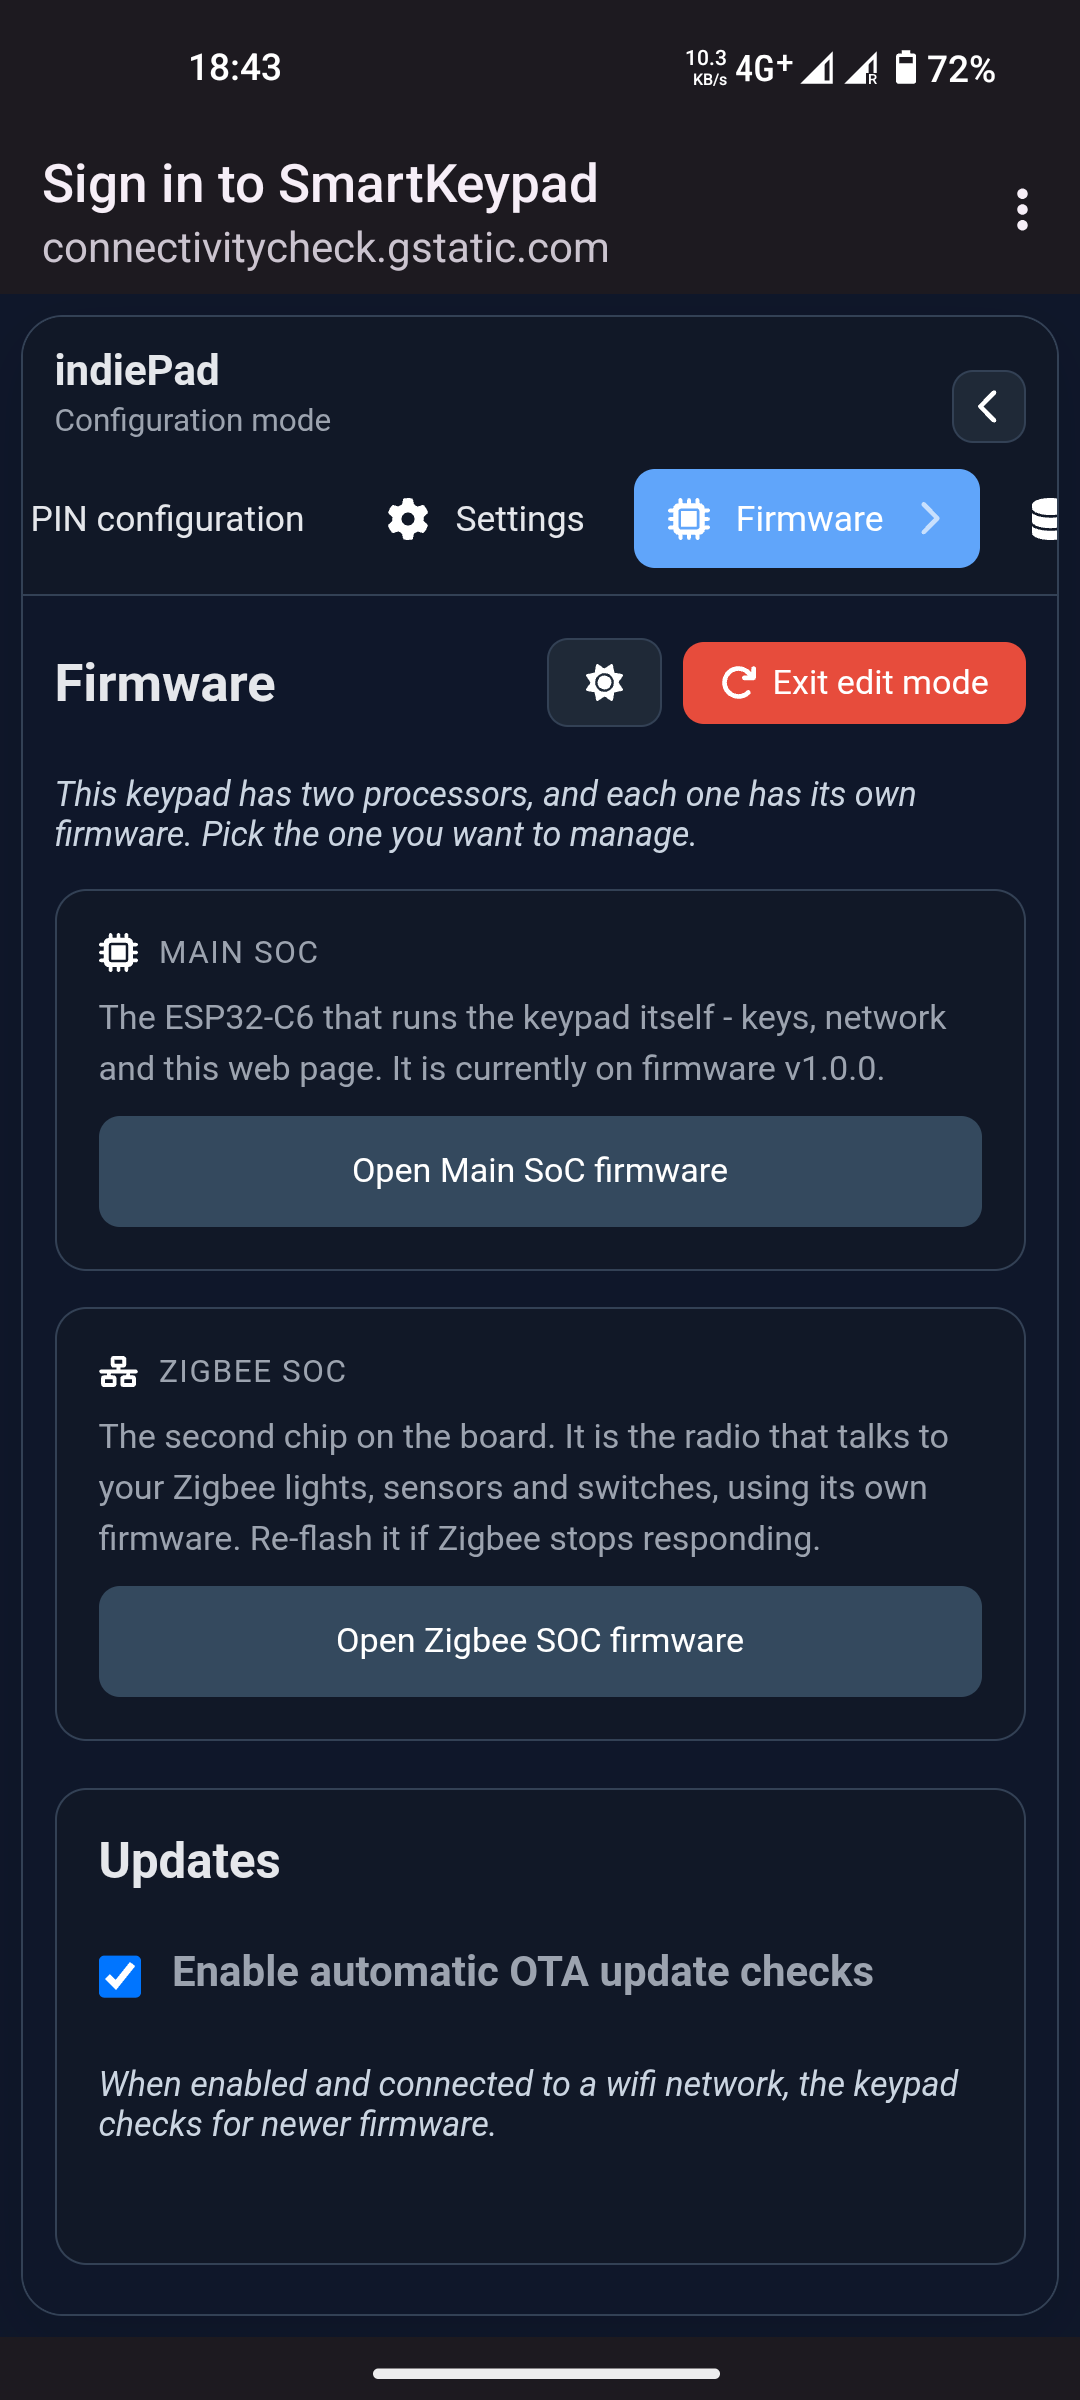
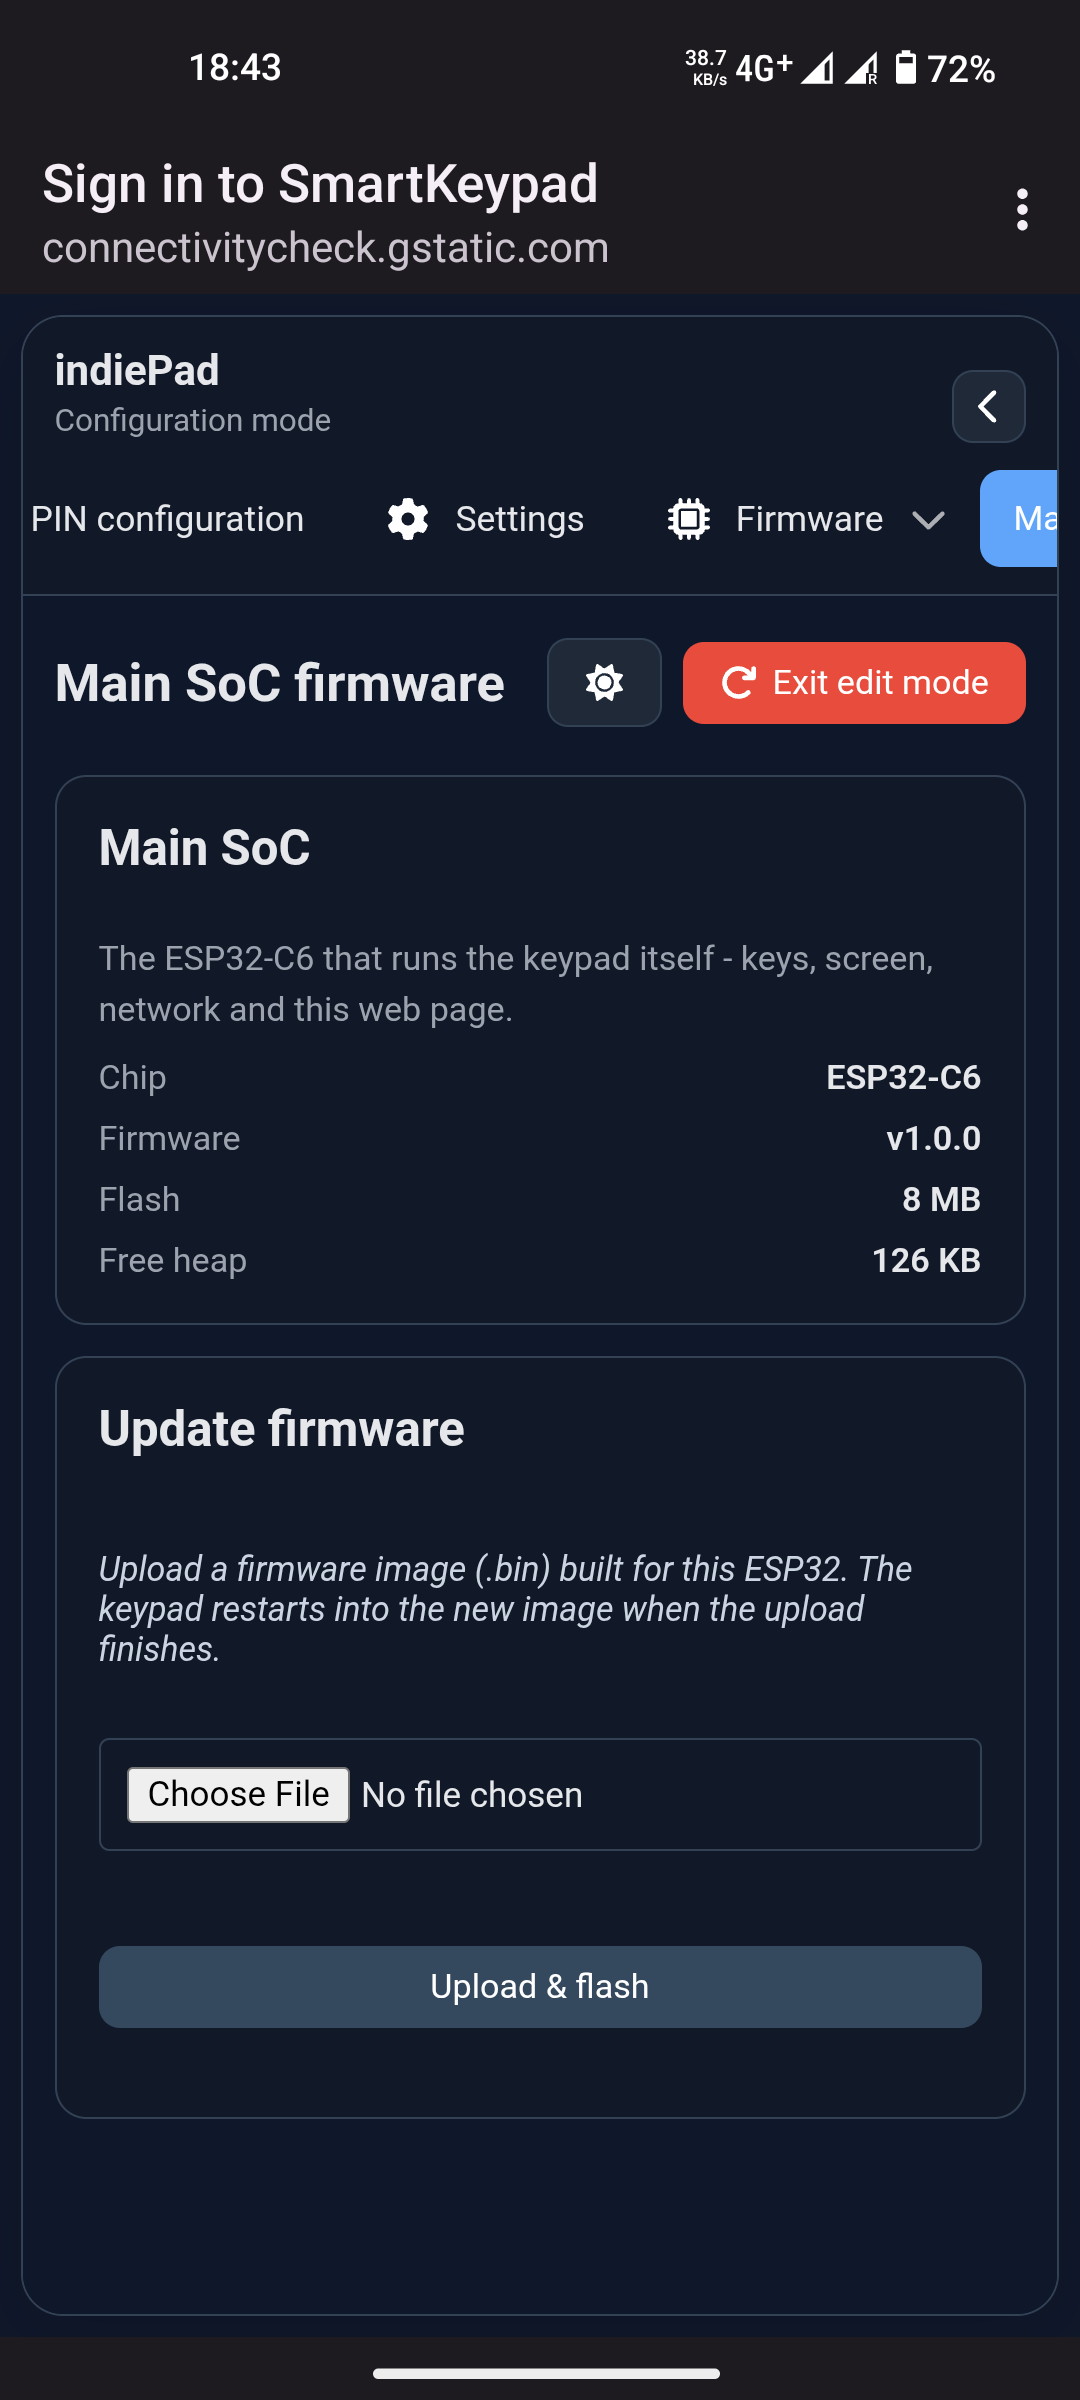
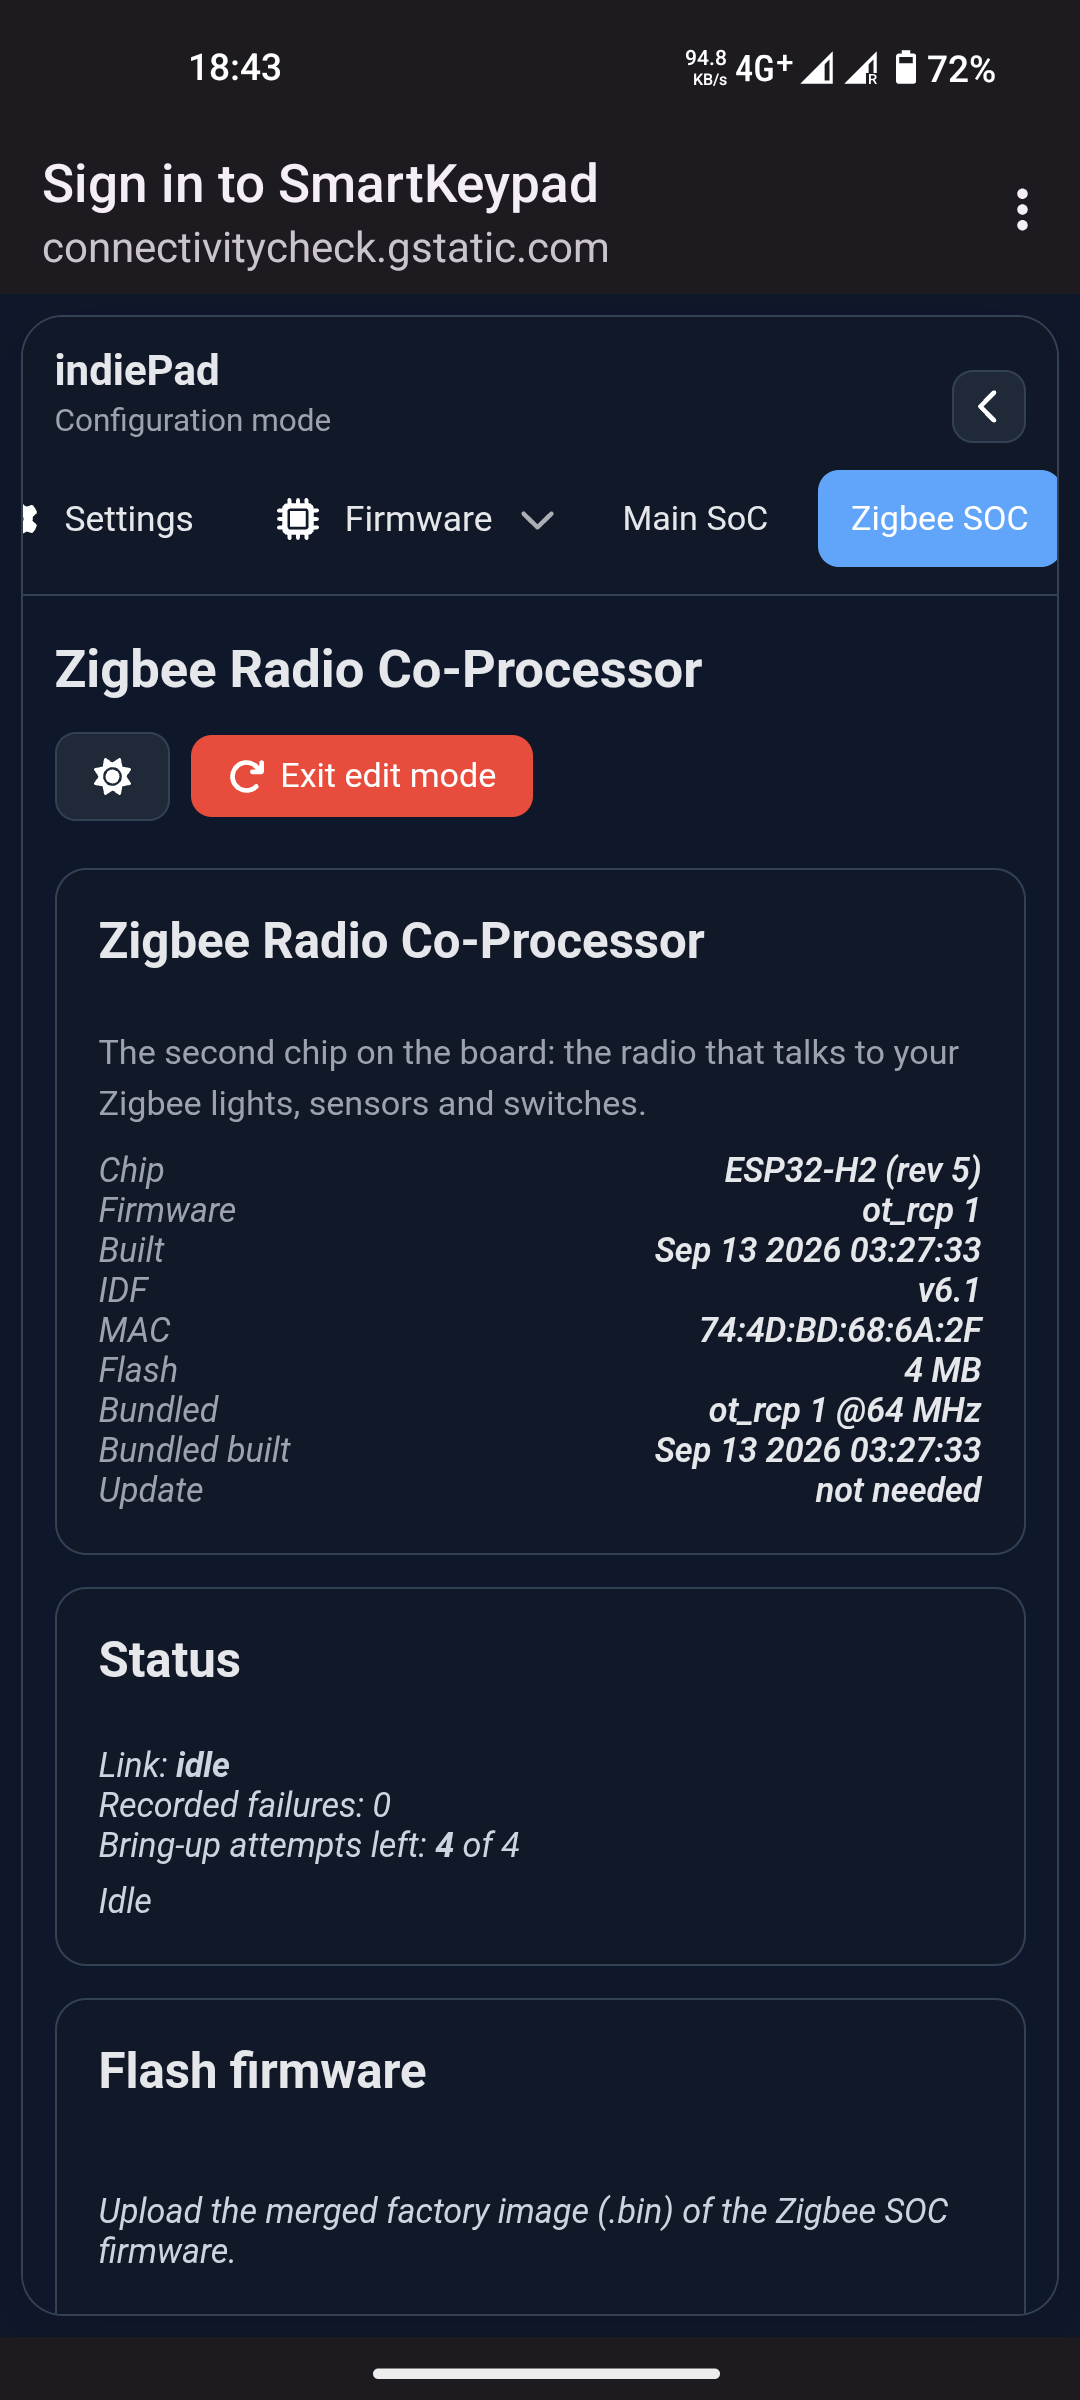
- Firmware - this keypad has two processors. Main SoC runs the keypad itself, and
Zigbee SOC is the radio co-processor; each has its own firmware page.
¶ Part 2: Home Assistant mode
Skip this part if you chose Coordinator mode.
¶ 8. Add the keypad to Home Assistant
When you finish setup in HA mode the keypad reboots and starts blinking yellow.
Blinking yellow means "connecting to a Zigbee network". While it is blinking yellow the
keypad is discoverable - this is when you add it to Home Assistant.
¶ Add it to Home Assistant (ZHA)
- In Home Assistant go to Settings > Devices & services.
- Click ADD INTEGRATION and pick Add Zigbee device.
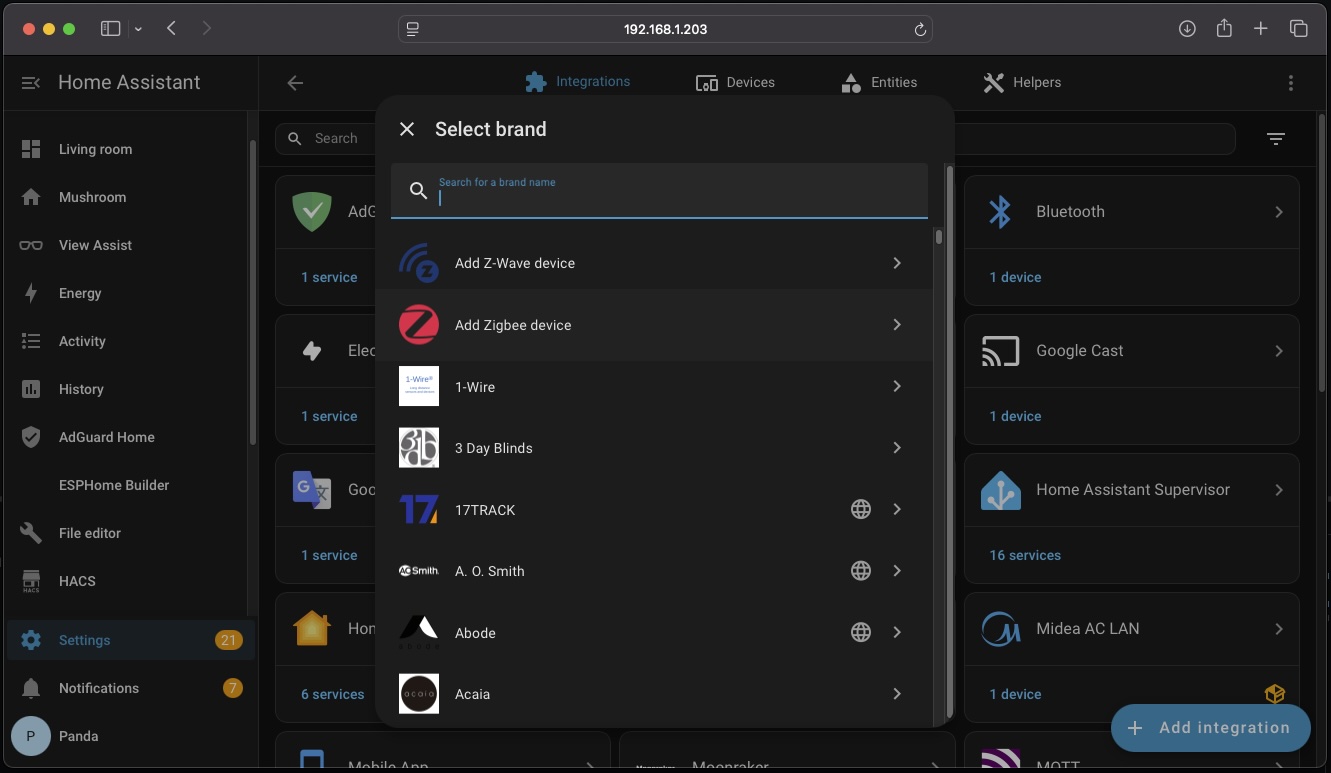
- Select the Zigbee radio - this opens the network for joining (permit join).
The keypad appears as ameriDroid indiePad:
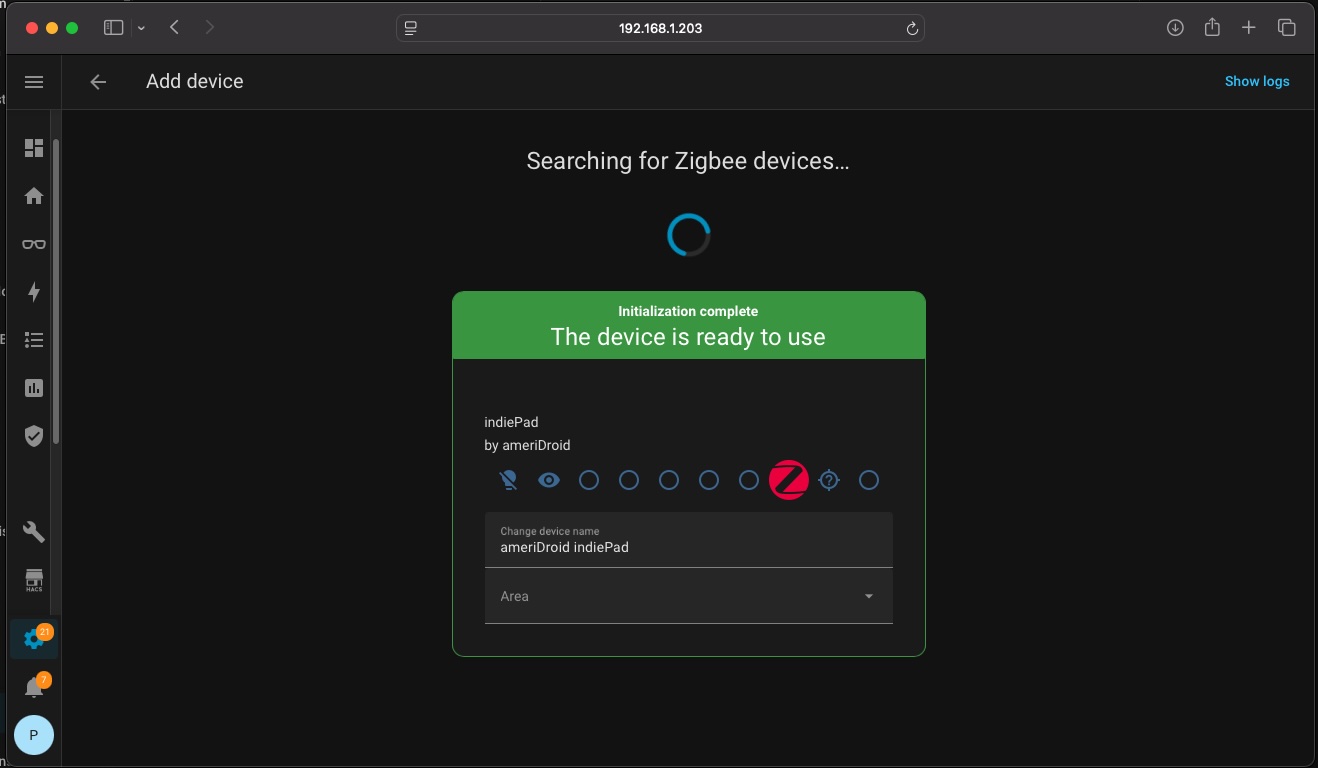
Once it stops blinking yellow it has joined.
¶ Add it via Zigbee2MQTT
- Open the Zigbee2MQTT frontend.
- Click Permit join (All).
- The keypad (ameriDroid indiePad) appears in the device list once it joins.
¶ 9. The endpoints (EPs)
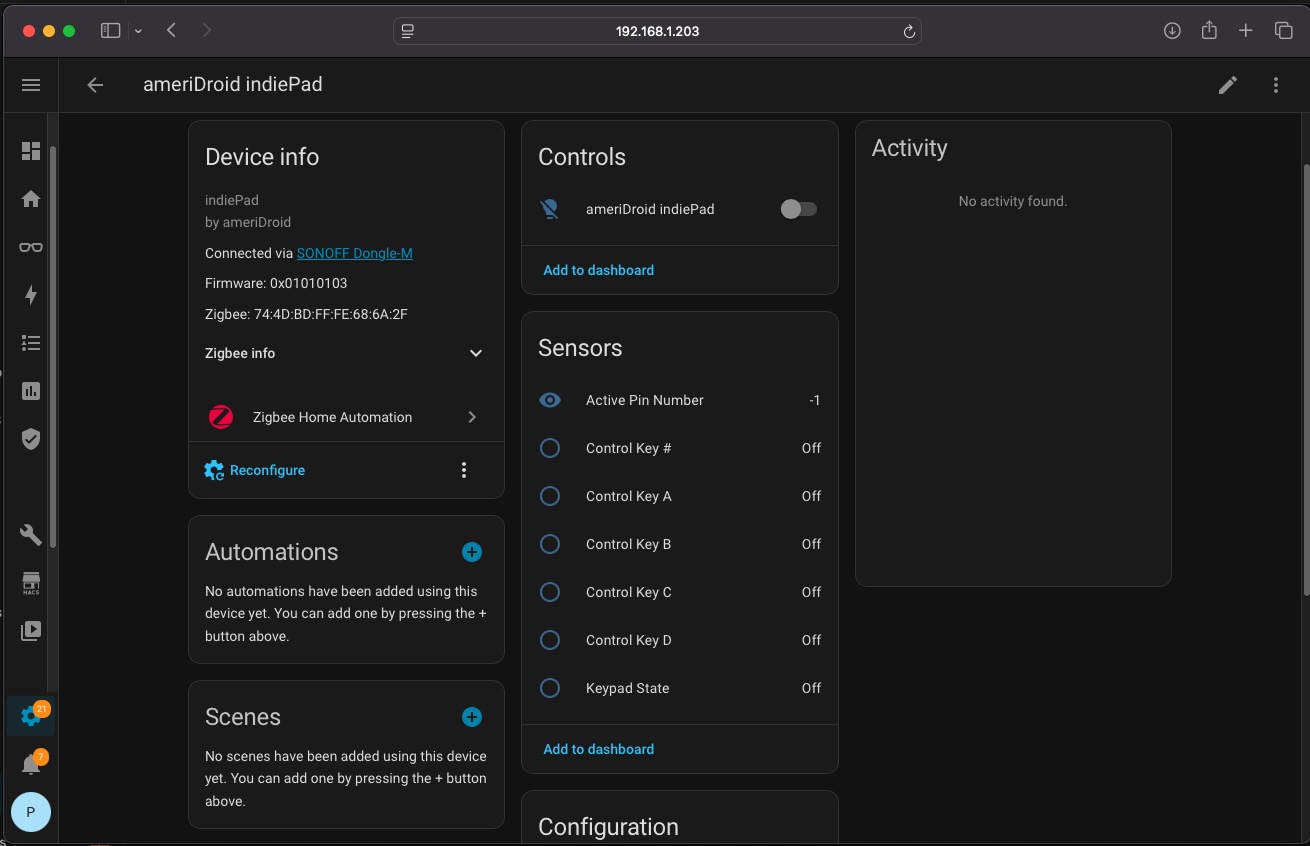
The keypad exposes several Zigbee endpoints. In Home Assistant they show up under the
device's Controls and Sensors:
| Endpoint | Type | Name | What it reports |
|---|---|---|---|
| EP10 | Binary input | Keypad State | ON when a valid PIN was just entered (keypad disarmed), OFF when armed. |
| EP11 | Analog input | Active Pin Number | The switch number of the PIN that was entered (-1 when idle). |
| EP12 | Binary input | Control Key # |
ON while the # key is held. |
| EP13 | Binary input | Control Key A |
ON while the A key is held. |
| EP14 | Binary input | Control Key B |
ON while the B key is held. |
| EP15 | Binary input | Control Key C |
ON while the C key is held. |
| EP16 | Binary input | Control Key D |
ON while the D key is held. |
| EP17 | Color dimmable light | Backlight | On/off, brightness and color temperature of the keypad backlight (V1.5/V1.6 boards only). |
The keypad also reports battery level (Power Configuration cluster) and supports OTA
firmware updates over Zigbee.
The two you will use most in automations:
- Keypad State - "a valid PIN was entered".
- Active Pin Number - "WHICH PIN was entered".
¶ 10. Sample Home Assistant automations
¶ Example A - "any valid PIN entered" (ZHA)
Turns on a switch and sends a phone notification whenever any PIN is accepted:
alias: Keypad - valid PIN entered
triggers:
  - trigger: state
    entity_id: binary_sensor.indiepad_keypad_state
    to: "on"
actions:
  - action: switch.turn_on
    target:
      entity_id: switch.front_door_lock
  - action: notify.mobile_app_your_phone
    data:
      message: "A valid PIN was entered on the keypad"
¶ Example B - "a specific PIN entered" (ZHA)
Unlocks the front door only when the PIN with switch number 3 is entered:
alias: Keypad - PIN 3 entered
triggers:
  - trigger: state
    entity_id: sensor.indiepad_active_pin_number
    to: "3"
actions:
  - action: lock.unlock
    target:
      entity_id: lock.front_door
Each accepted PIN sets Active Pin Number to its switch number, which goes back to -1
when the keypad is idle again, so the same PIN entered twice in a row still triggers.
Finding the exact entity names: in Home Assistant, after pairing open the ameriDroid
indiePad device page - it lists every entity and its id. Use those ids in place of the
example names above.
¶ Part 3: Coordinator mode
Skip this part if you chose Home Assistant mode.
¶ 11. Coordinator mode
In coordinator mode the keypad is your Zigbee network - no hub required. It forms its own
network, pairs devices directly, and runs automations locally on the device.
How it works
- Form the network - the keypad picks a channel and PAN ID and becomes the coordinator.
The radio runs on the ESP32-H2 co-processor, so the keypad itself stays free to run the
dashboard and automations. - Permit join - open the network from the dashboard's Coordinator tab, then put your
device into pairing mode. It joins and gets interviewed automatically (endpoints, clusters,
manufacturer/model).
- Assign roles - each discovered endpoint is given a role so the dashboard knows how
to show and control it:binary,sensor/measurement,cover,analog,light,
fan,multistate,button,ias,occupancy,tamper. Measurements can also get a
display unit (V/mV, A/mA, W/mW, C/F/K, ...). - Control - drive devices straight from the dashboard, or from PINs and control keys
through automations. - Automate - build when/if/then rules that run locally (see section 12).
¶ Zigbee performance
If devices respond slowly, or keep dropping off the network, the cause is usually radio
congestion. Open Coordinator > (gear) > Scan channels to see how busy each channel is and
which one is the quietest, then set the coordinator to a quieter channel and reboot. A
channel away from your 2.4 GHz Wi-Fi (and from a neighbor's) is usually the fix.
¶ Device support
Zigbee device support is broad but not guaranteed. There are thousands of Zigbee devices
and some use manufacturer-specific clusters, so a few may not work out of the box. We keep
improving support for whatever we can get our hands on - if a device does not behave as
expected, tell us which one it is and we will look into it:
https://ameridroid.com/pages/contact
¶ Moving to another keypad
The coordinator's stored state - the paired-device database, entity names and automations -
can be exported and imported, so you can carry a set-up network over to a replacement
keypad. The new keypad re-forms the same network; the devices need to rejoin it once.
¶ 12. On-device automations
In coordinator mode the keypad can run automations on the device - rules that react to
PINs, control keys, sensors and time, and drive the Zigbee devices paired to the keypad. Build
them in the Automations tab of the dashboard.
Full guide, with the rule syntax and examples: Automations
Time triggers need the keypad on your Wi-Fi (not in AP mode) with a timezone set, so it
can sync its clock.Using Home Assistant mode? You build automations in Home Assistant instead, reacting to
the keypad's entities (see section 9).
¶ Part 4: Reference
¶ 13. Switching modes
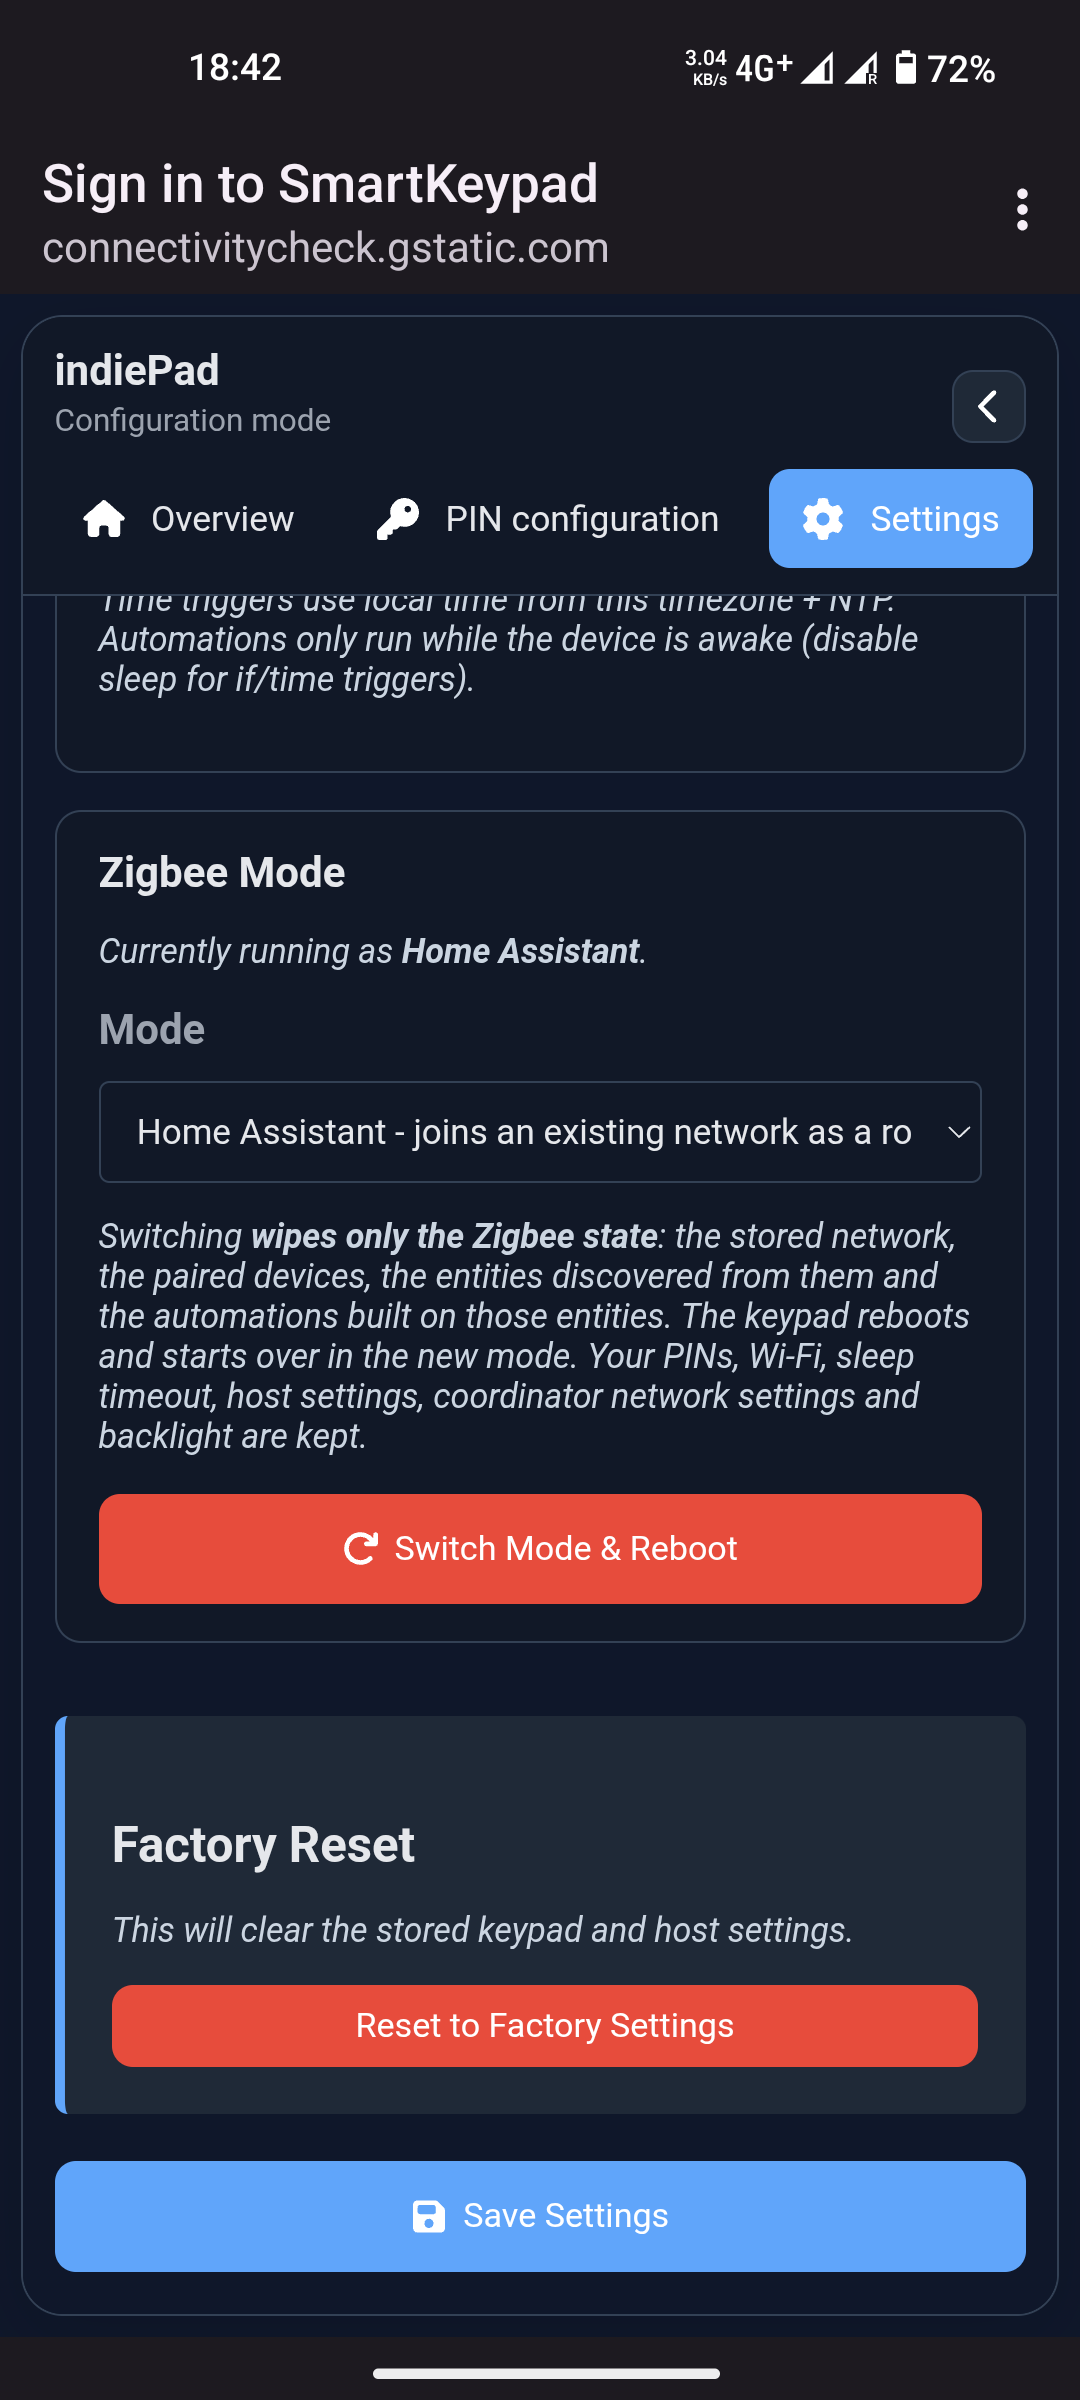
Switching modes later wipes the Zigbee network, paired devices and automations (PINs, Wi-Fi
and other settings are kept). It is done from Settings > Zigbee Mode:
¶ 14. Quick reference / troubleshooting
| Symptom | Cause / fix |
|---|---|
| Keypad won't turn on | Press * - it is asleep. If it still doesn't wake, the battery may be flat: plug it into USB to charge (the LED breathes red while charging) and try again. |
No SmartKeypad network |
The keypad is already configured. Reboot, or hold * to reopen the portal. |
| Browser didn't open after connecting to Wi-Fi | Tap the "sign in to this Wi-Fi network" notification, or open http://192.168.4.1/ |
| Can't reach http://indiepad.local | mDNS isn't resolving on this device. Use http://192.168.4.1 (AP mode) or the LAN IP from your router (Wi-Fi mode). |
| Blinking yellow forever | The network was not open for joining. Re-open permit join in ZHA/Z2M, or re-run the join. |
| Forgot the master PIN | Factory reset with the ERASE button inside the case - see Reset buttons. This erases all PINs and settings. |
| Want to switch HA <-> Coordinator | Settings > Zigbee Mode. Wipes Zigbee pairings and automations. |
| Devices are slow or drop off (coordinator) | Radio congestion. Scan channels in Coordinator settings and pick a quieter one. |
| A device doesn't work as expected | Zigbee support is broad but not guaranteed - tell us the device at https://ameridroid.com/pages/contact |
¶ 15. Reset buttons
The keypad has two small buttons on its circuit board, inside the case. You only need them
for recovery.
To reach them, remove the 4 screws holding the case together and open it. The
buttons are labeled ERASE and BOOT on the board.
| Button | Hold for | What it does |
|---|---|---|
| ERASE | 10 seconds | Full factory reset. Erases all PINs, the master PIN, Wi-Fi settings, Zigbee pairing and automations, then reboots into the setup wizard. The buzzer sounds when you start holding; release before 10 s to cancel. |
| BOOT | 3 seconds | Zigbee reset only. Leaves the Zigbee network so the keypad can be paired again. PINs, the master PIN and other settings are kept. |
Forgot the master PIN? Only ERASE helps - BOOT keeps the master PIN. After the reset,
set the keypad up again from First-time setup.