¶ Create Users and Groups
It is not recommended to use the built-in "Admin" account as a user account.
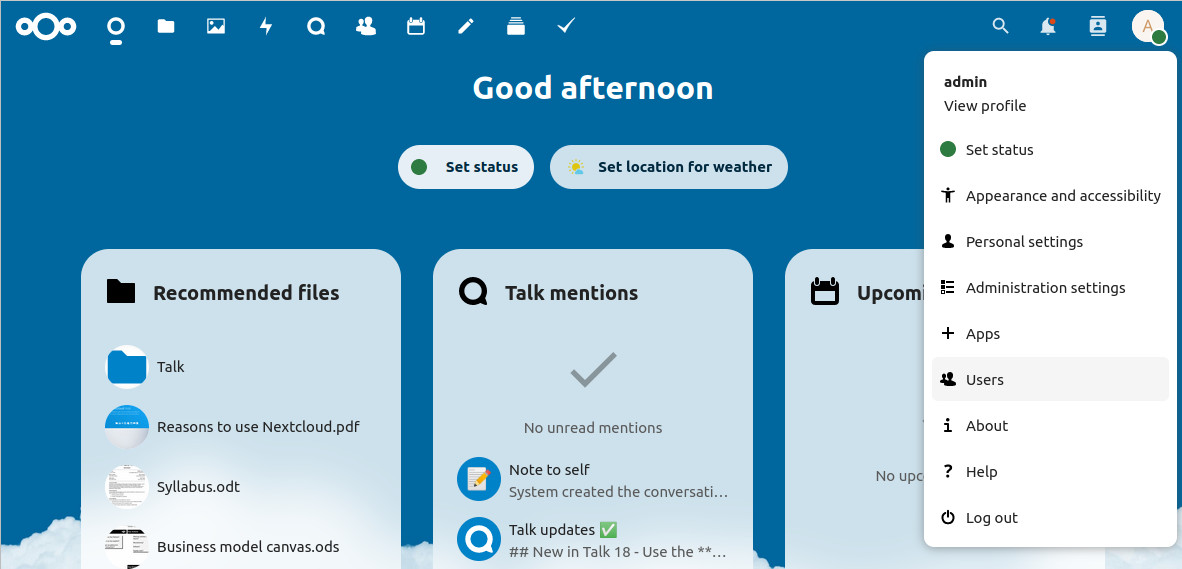
In the upper-right corner of the Nextcloud home screen of your Indiedroid Nova on your browser, there should be an "A" in a circle. Click that and select "User".

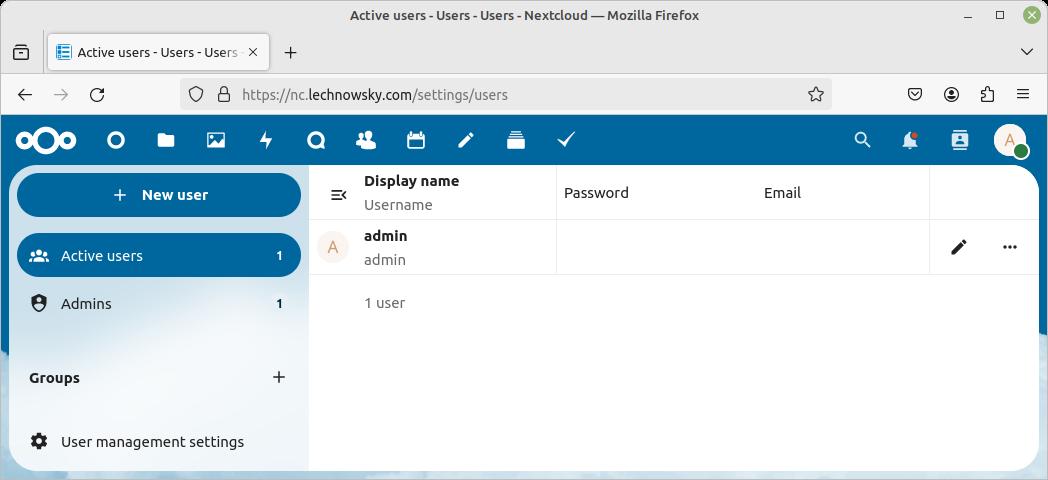
This should bring you to the following screen:

If you can't see the "+ New User" button, it is likely because your window is too narrow. You can click on the  (three horizontal stacked lines) on the upper left side of the window to see the necessary sidebar.
Click the "+" sign next to "Groups" and create a group called "Users".
Now, click the "+ New User" button and create a new user and add them to the "Users" group. The "Quota" section will determine how much space this user can use on the Nextcloud server.
This user can now connect to this Nextcloud server from any browser on any computer with an Internet connection.
This user can also connect to this Nextcloud server from a smart device (smartphone, tablet, etc.) with Nextcloud apps on it, or with the browser on the smart device.
¶ Recommended Apps
We recommend downloading the following apps on your smart devices.
- Nextcloud
- Photos (for Nextcloud)
- Nextcloud Deck
- Nextcloud Talk
- Nextcloud Notes
When it asks for the location of the Nextcloud server, enter the address that you created when setting up the Nextcloud software initially (for instance, nc.mydomain.com).
Aside from the above, there are additional components you can add to your Nextcloud server. Some of these components have apps, but others require the add-on to be accessed from the desktop browser interface.
¶ Syncing Photos from your Smartphone
¶ Android
There are known issues that can cause the Auto Upload process to fail. In order to minimize the risk of this, it is recommended to:
- Only set up one Auto Upload folder at a time
- Wait until that folder is finished uploading before setting up another one
- Staying on the same network (hopefully Wifi) so that the upload process does not get interrupted
If the Auto Upload process fails, it may be necessary to perform troubleshooting steps on the Nextcloud app on the smartphone. See section below for troubleshooting.
¶ Setting up Auto Upload for your folders
- After downloading and installing the main Nextcloud app, run the Nextcloud app and sign in with your Nextcloud user account.
- In the upper-left corner, click the
 icon and select "Settings".
 - Select the option "Auto upload".
- You should see one or more folders that have pictures in them on your phone. Find a folder you want to sync and press the three vertical dots to the right side.
- Select "Configure" from the menu that shows up.
- Click the switch to the right of "Auto upload".
- Select the options you want and click "Save".
- After clicking "Save", a window may appear titled "Battery optimization". Click "Disable" to allow AutoUpload to work properly.
- Click the back arrow in the top left corner twice to go back to the menu.
- Select the "Uploads" option.
- If there are a lot of photos in the folder that you selected, it may take a while before those photos show up in the "Uploads" area. Be patient. After the files show up, they should start uploading. Wait until they are all uploaded before setting up the next folder to Auto Upload. You may have to pull down on the Uploads list to update it if it looks like it hasn't updated in some time.
- Once the uploads are finished, click the left arrow in the upper left corner and go back to "Settings" and "Auto Upload" to start the upload of the next folder.
¶ Troubleshooting Auto Upload
If all uploads on Upload screen are showing "Failed", "App terminated", or "Waiting on upload" after a long time, follow the steps below.
- First, try refreshing the Uploads screen.
- If the above doesn't fix the issue, fully close the Nextcloud app on the smartphone. Don't just go away from the app, but go to the app switcher and swipe the app away to fully close it. Restart the phone if you are unsure, and want to be sure of closing the app.
- Reopen the Nextcloud app.
- Go to the "Uploads" screen.
- If there is a "Reload" icon in the upper right corner, press that and wait a while to see if the files start to upload again.
- If the uploads don't continue after a patient period of waiting, repeat steps starting at #1 above.
If Upload screen won't show new files to upload in the "Uploads" area, follow the steps below.
Note: This will require you to reconnect your Nextcloud app to your Nextcloud server again, and will require you to also log in again.
- Click the gear icon on the main screen of your Android device (the Android settings icon).
- Click the magnifying glass (search feature) and type "Apps".
- Find the result that simply says "Apps" and select it.
- Scroll down to "Nextcloud" and select it.
- In the bottom right corner, select "Force stop" and then "OK".
- Select the "Storage" option.
- On the "Storage" screen, select "Clear cache".
- Next, select "Manage storage".
- On the "Manage storage" screen, select "Clear data".
- Open the Nextcloud app back up, and proceed with the steps to reconnect it to your Nextcloud server.