¶ IndieDroid Nova Nextcloud Bundle - Setup Guide
¶ Prerequisites
- 10 to 60 minutes
- Internet connection
- Serial adapter or keyboard and screen
- (Recommended) Create an account on Cloudflare for reverse tunneling
- (Alternative) External IP address from your Internet provider, and the ability to port forward
If you don't have the ability to portforward or don't have a public IP that's adressed later
¶ Step 1: Connect to Serial Console
You can use a keyboard and screen if thats easier for you.
-
Connect to the serial console with a baud rate of 115200 using a tool like
picocom. Run the following command:picocom -b 115200 /dev/ttyUSB0 # Replace /dev/ttyUSB0 with your serial port -
Wait for the board to boot.
-
Once booted, you'll see the login prompt:
Arch Linux 5.10.110-rockchip-rk3588 (ttyFIQ0)

bredos login: bred (automatic login)
¶ Step 2: User Setup
-
After login, you'll be prompted to enter a username for the board.
Enter username: panda -
Enter a password when prompted.
Enter password: -
Enter a new hostname when prompted.
Enter new hostname: panda-nextcloud -
The system will provide information about the user creation and hostname setup. You can now restart the board.
¶ Step 3: Port Forwarding
Please follow the instructions at Nextcloud with Cloudflare Tunnel if you can't open a port or don't have access to an external IP address.
Skip to Step 2 below after doing all the "Nextcloud with Cloudflare Tunnel" steps
-
Port forward port 80 and 8443 to the Indiedroid Nova running Nextcloud.

-
Open your browser and go to
nextcloud.example.com:8080. You should see the "Nextcloud AIO setup" page. If you can't see a page similar to below, try using the IP address of the Nextcloud device followed by :8080, such ashttps://192.168.0.2:8080(replace 192.168.0.2 with the address of your Nextcloud device on your network. -
Copy the password provided, as you will need it later.
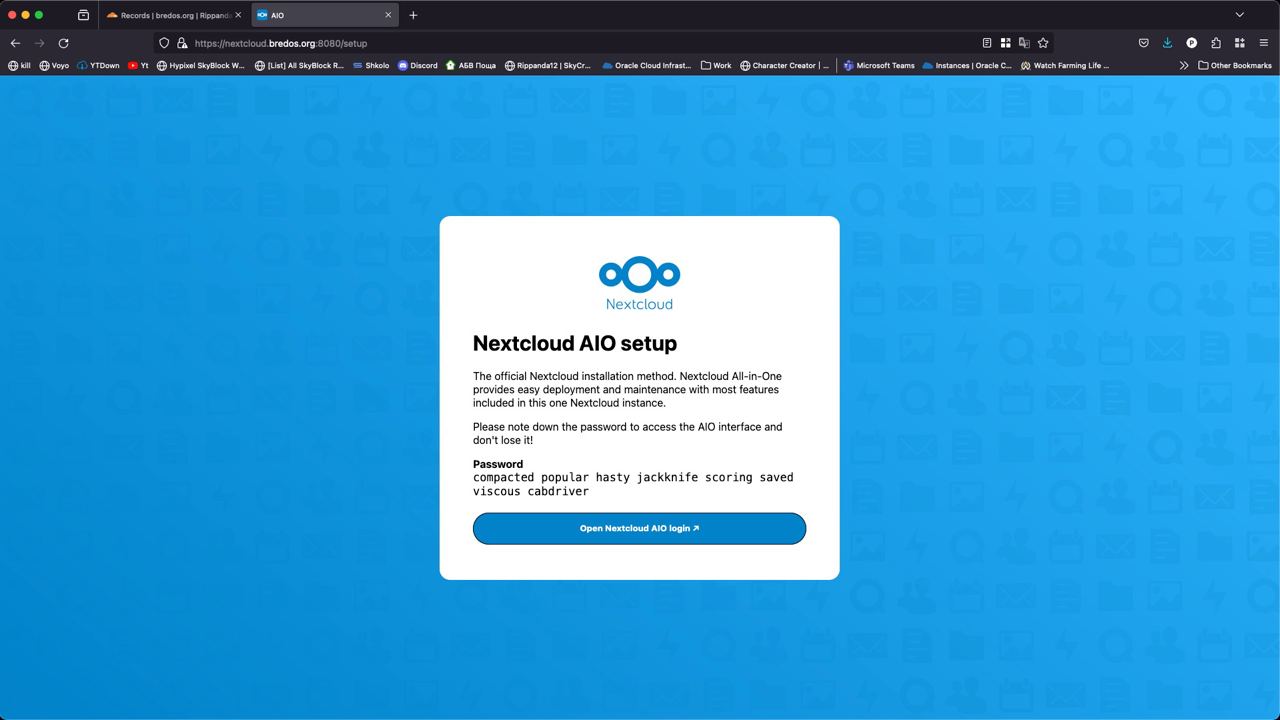
-
Click on "Open Nextcloud AIO login". Paste the password you just copied.
-
On the Nextcloud AIO setup page, there will be a field that states
nextcloud.yourdomain.comwith aSubmit Domainbutton next to it. Enter your domain (nextcloud.example.com) and click the "Submit domain" button.
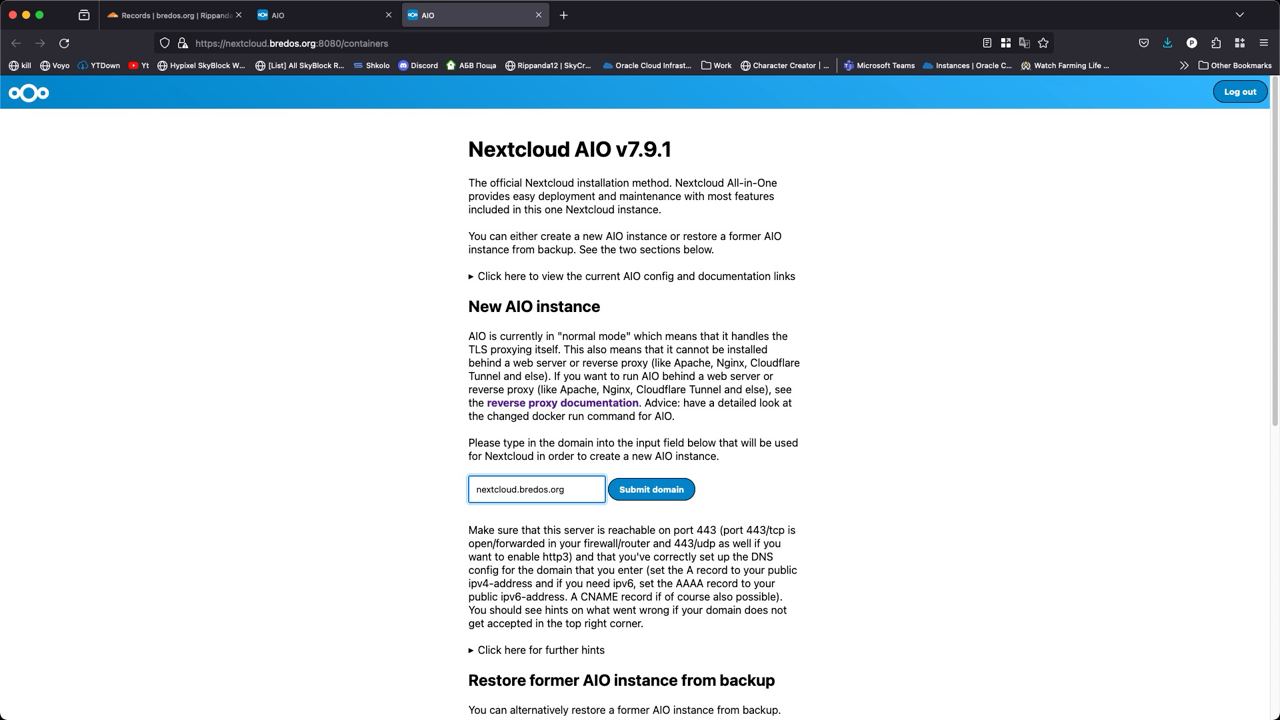
-
Pick the containers you want for your Nextcloud instance and click the "Download and start containers" button.
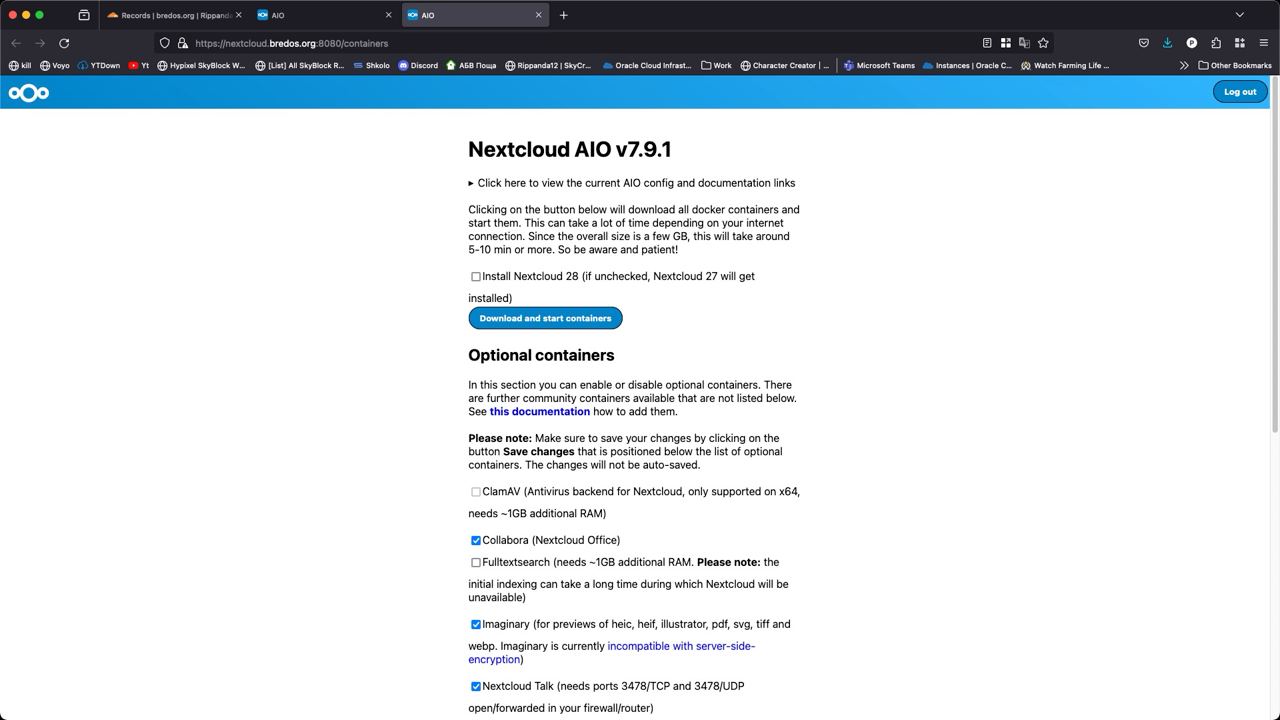
-
The containers will start downloading and running. You can click "Refresh" to check their status.
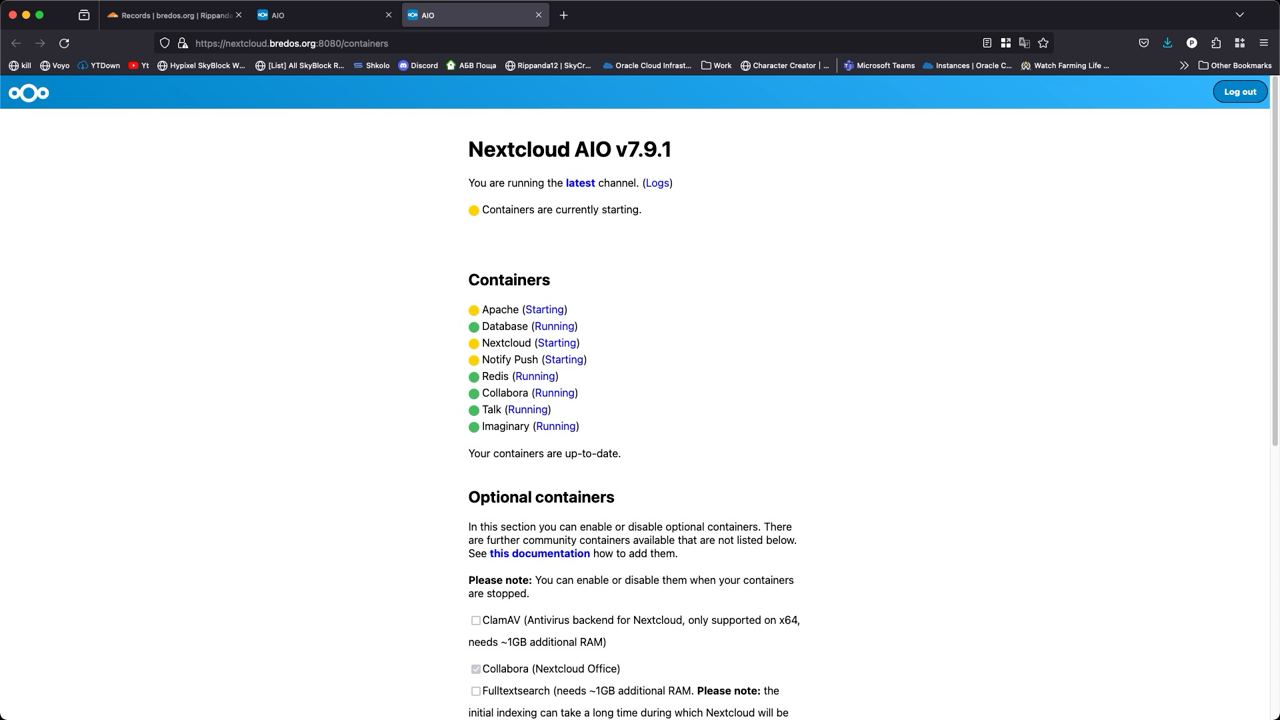
-
Once all containers are started, you'll receive a password and username. Save them for the next step.
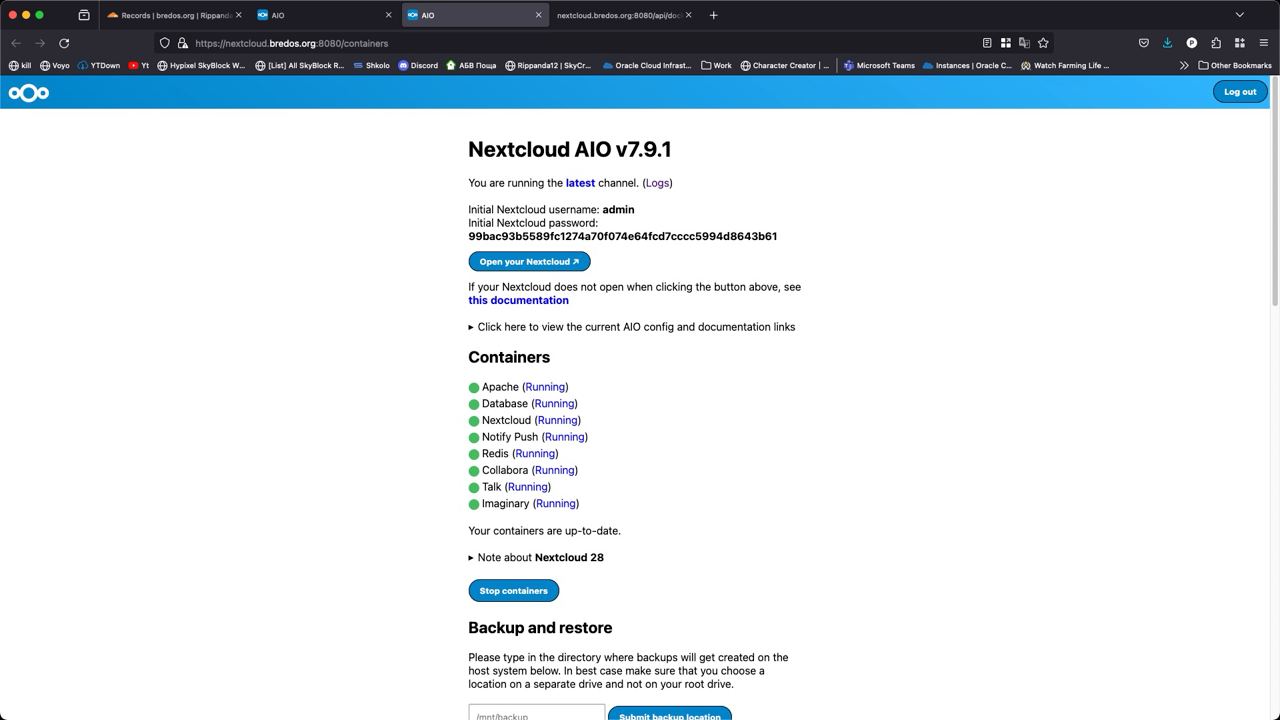
-
Click "Open your Nextcloud" and log in using the provided username and password.
-
You are now greeted by Nextcloud! Your setup is complete.
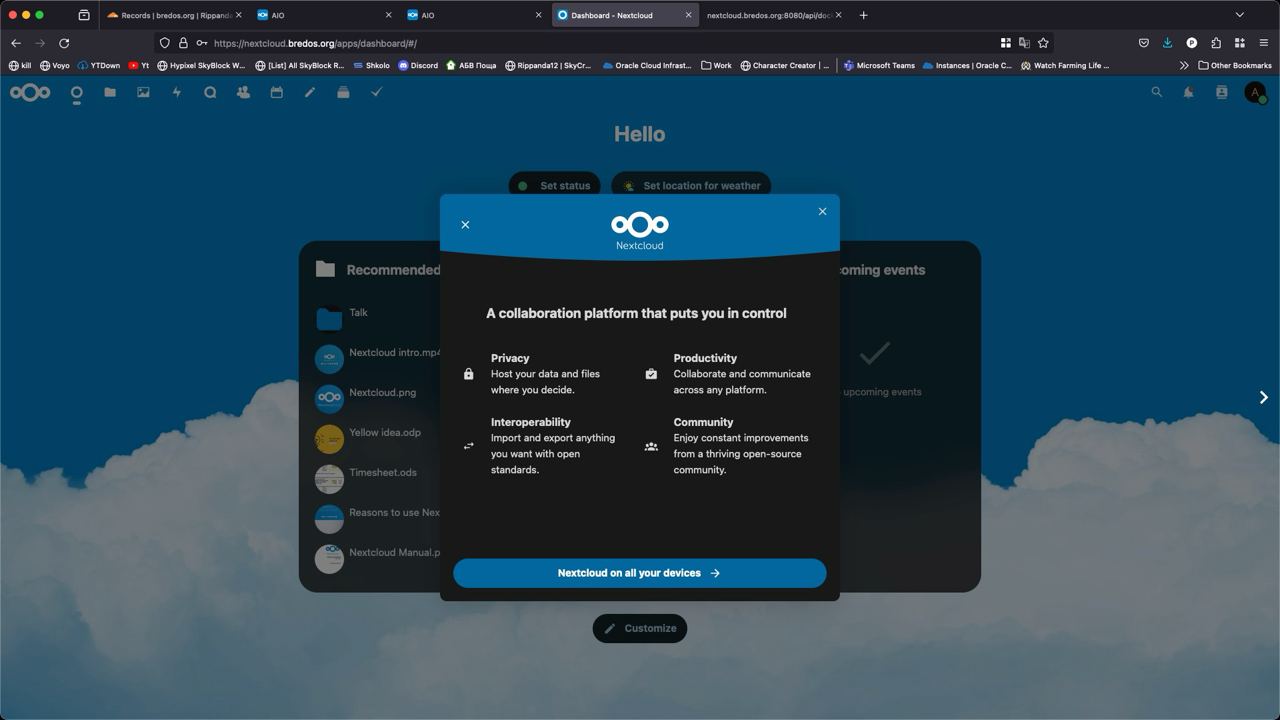
-
Don't forget to change your password for security reasons.
Congratulations! You have successfully set up your Indiedroid Nova Nextcloud Bundle and can now start using Nextcloud for your file synchronization and collaboration needs.
¶ Set timezone
In order for dates and times to be accurate on your Nextcloud system, set the timezone using the following method:
timedatectl list-timezones
This will display a list of timezones. Find a city or location that is in your timezone and make a note of the full name of that location. Press the space bar to see the next page. When you find a location that is in your timezone, press CTRL+C to exit.
For instance, to set the timezone to Los Angeles, use:
timedatectl set-timezone America/Los_Angeles
Next, type date and verify that the output is correct.